Tuesday, 31 May 2016

UberChic Beauty Collection 9 - Swatches And Review


Hi girls! Today I will  show you the Collection 9  from UberChic Beauty! It contains three plates as all the previous sets. 
These plates are perfect for summer! There are Fruits,  tropical flowers, ice cream cones, pineapples, flamingos, watermelons, sandals, icicles and so on...but there is also a big variety of negative spaced images, inspirational words, geometrical images and flowers!
Each plate measure 9.5 x 14.6 cm and they have full nail images that measure 2.1 cm x 1.7 cm, large multi-nail images and smaller individual images.  The back of the plates is paper and there is a blue film that must be removed before use. The quality is excellent as always!
You can see also the reviews about the Collection 1Collection 2Collection 3Collection 4,  Collection 5,  Collection 6 , Collection 7 and Collection 8).
These three plates are available HERE. The price is $24.99 for the entire set + shipping cost. 
I let you with all images and with my video tutorial!!!


Ciao ragazze! Oggi vi mostrerò la Collection 9 di UberChic Beauty! Essa contiene tre piastre come tutti i set precedenti.
Queste piastre sono perfette per l'estate! Ci sono frutti, fiori tropicali, coni gelato, ananas, fenicotteri, angurie, sandali, ghiaccioli e così via ... ma c'è anche una grande varietà di immagini "negative space", scritte, immagini geometriche e fiori!
Ogni piastra misura 9,5 x 14.6 cm e hanno immagini a grandezza intera  che misurano 2,1 cm x 1,7 cm,  grandi immagini multi-unghie e piccole immagini singole. La parte posteriore delle piastre è in carta e c'è una pellicola blu che va rimossa prima dell'uso. La qualità è ottima come al solito!
Potete vedere anche le recensioni sulla Collection 1Collection 2Collection 3Collection 4,  Collection 5 , Collection 6 , Collection 7 e Collection 8).
È possibile comprare queste tre piastre QUI. Il prezzo è di $ 24,99 per l'intero set + spese di spedizione.
Vi lascio con le immagini e con il mio video tutorial !!!


 The back of these plates is protected, so, the edges  aren't sharp!!! 
---------
La parte posteriore di queste piastre è protetta, quindi, i margini 
non sono taglienti !!!


Remember to remove the blue film
--------
Non dimenticate di rimuovere la pellicola blu!!!!


Each plate measures 14.6 cm x 9.5 cm
-------
Ogni piastra misura 14.6 cm x 9.5 cm


Almost all the images measure 2.1 cm x 1.7 cm
---------
Quasi tutte le immagini misurano 2.1 cm x 17 cm


UberChic Beauty 9-01


UberChic Beauty 9-02


UberChic Beauty 9-03


I tested some designs with Essence Stampy Black
-----
Ho testato alcune immagini con Essence Stampy nero


Video Tutorial:


Thanks for watching!!! ♥

Friday, 27 May 2016

French Manicure with UberChic Beauty Paris in Love - Tutorial


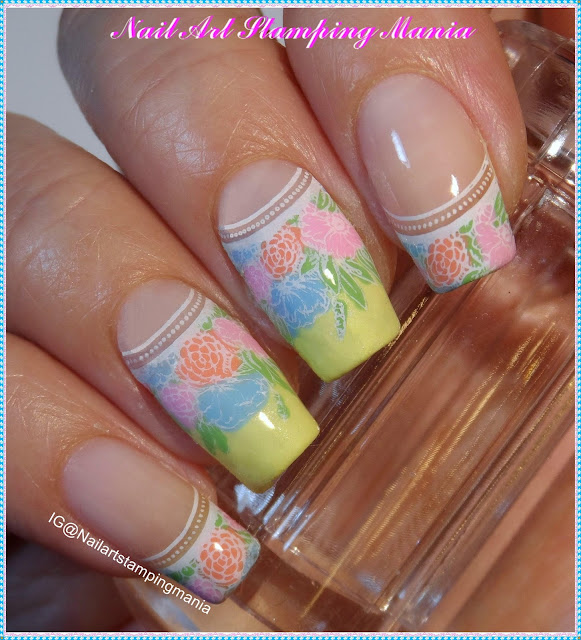
Hi girls! Today I'll show you an easy french Manicure with stamping decal technique! 
I applied my usual base coat. Later, I started doing some stamping decals with the UberChic Beauty
stamping plate ÜC Uber Mini Paris In Love and Essense Stampy White.
I applied the top coat and I painted the decals with some pastel nail polishes! I let them dry and I applied on my nails. 
For ring and middle finger I chose to do half moon nails, so, I painted the decals also with pastel yellow.
Finally I applied the top coat! 
This plate is available HERE
Don't miss the video tutorial below!!!


Ciao ragazze! Oggi vi mostrerò una french manicure molto facile con la tecnica dello stamping decal!
Ho applicato la mia solita mano di base. Poi, ho iniziato a fare alcuni stamping decals con la piastra di UberChic Beauty UC Uber Mini Paris In Love ed Essense Stampy Bianco
Ho applicato il top coat e ho dipinto i decals con alcuni smalti per unghie color pastello!
Ho lasciato asciugare e ho applicato sulle mie unghie.
Per l'anulare e il dito medio ho scelto di fare le unghie con la lunetta, così, ho dipinto i decals anche con smalto giallo pastello. Infine ho applicato il top coat!
Questo piastra è disponibile QUI
Non perdete il video tutorial qui sotto !!!


Essence Stampy White, Kiko Quick Dry 853, Essence 55 Be Awesome Tonight, Essence 63 Itsy Bitsy
Blue Bikin, Essence 26 Brazil Jungle and Essence 57 Ice Cream Party.


ÜC Uber Mini - Paris In Love


The pattern that I choose.
--------
Il modello che ho scelto.


Video Tutorial:


What I used:

Cosa ho Usato:

  1. Base: Layla Rocky Nail
  2. Stamping Decal: Kiko Quick Dry 853, Essence 55 Be Awesome Tonight, Essence 63 Itsy Bitsy Blue Bikin, Essence 26 Brazil Jungle and Essence 57 Ice Cream Party.
  3. Stamping Plate: ÜC Uber Mini - Paris In Love
  4. Stamping Polish: Essence Stampy White,
  5. Top coat:  Essence Quick Dry


Thanks for watching!!! ♥


Sunday, 22 May 2016

Coffee Manicure with Uber Mini Coffee Addict from UberChic Beauty


Hi to everyone!!! Today I made a Coffee Manicure with the Water Marble technique and Uber Mini Coffee Addict stamping plate from UberChic Beauty!
I'm not very able with water marble technique but sometimes I can not resist his charms! Q___Q
Italians are big lovers of coffee and this plate is perfect with the writing "Cappuccino", "Latte Macchiato", "Espresso" and so on!!!
First of all I applied two coats of white polish and I let it dry. Then, I protected  my cuticles with liquid latex...
I put some mineral water at ambient temperature in a bowl and I added one drop for each color.
I removed the liquid latex, I cleaned perfectly the cuticles and I stamped with ÜC Mini Uber Coffee Addict plate and a stamping polish brown that I made with brown pigment and top coat.
Finally I protected with top coat Essence Quick Dry.
This plate is available HERE.
Video tutorial at the end of the post!


Ciao a tutti!!! Oggi ho fatto una manicure dedicata al caffè con la tecnica water marble e  la piastra Uber Mini Coffee Addict di  UberChic Beauty!
Io non sono molto capace con la tecnica di marmo acqua, ma a volte non riesco a resistere al suo fascino!
Noi italiani siamo grandi amanti del caffè e questa piastra è perfetta con le scritte "Cappuccino", "Latte Macchiato", "Espresso" e così via!!!
Prima di tutto ho applicato due mani di smalto bianco e ho lasciato asciugare. Poi, ho protetto le mie cuticole con il lattice liquido ...
Ho messo un po' d'acqua minerale a temperatura ambiente in una ciotola e ho aggiunto una goccia per ogni colore.
Ho tolto il lattice liquido, ho pulito perfettamente le cuticole e ho timbrato con piastra UC Mini Uber Coffee Addict  e uno smalto per stamping marrone che ho fatto con pigmento marrone e top coat.
Infine ho protetto col top coat Essence Quick Dry.
Questo piatto è disponibile QUI
Video tutorial alla fine del post!


Wet n Wild French White Crème, Essence 54 Dream On, Kiko 370, Essence Tribal Summer 03, Kiko Mirror 617, Franken stamping polish made with brown pigment mixed with top coat.


UberChic Beauty Uber Mini Coffee Addict


The patterns that I choose.
--------
I modelli che ho scelto.


Video Tutorial:


What I used:

Cosa ho Usato:

  1. Base: Layla Rocky Nail
  2. Base Polish: Wet n Wild French White Crème
  3. Water Marble Polishes: Essence 54 Dream On, Kiko 370, Essence Tribal Summer 03 and Kiko Mirror 617.
  4. Stamping Plate: UberChic Beauty Uber Mini Coffee Addict
  5. Stamping Polish: Franken stamping polish made with brown pigment mixed with top coat. 
  6. Top coat:  Essence Quick Dry

Thanks for watching!!! ♥

Monday, 16 May 2016

Gradient Manicure with Acrylic Stamping Plate from Cici&Sisi - Swatches And Review


Hi to everyone!!! Today I made a Gradient Manicure with the new Acrylic stamping plate from  Cici&Sisi!
First of all I applied the liquid latex around my nails. I applied two coats of white polish and I let it to dry. With the help of a beauty sponge I made a gradient using Kiko 361 and Kiko 355.

I removed the liquid latex and I stamped with the acrylic plate Wedding Season 01 from Cici&Sisi and Konad Black...
This Acrylic Plate is available HERE  and the price is 5.99.
Don't miss the video at the end of the post!


Ciao a tutti!!! Oggi ho fatto una manicure sfumata con la nuova piastra in Acrilico di Cici&Sisi!
Prima di tutto ho applicato il lattice liquido intorno alle unghie. Ho applicato due mani di smalto bianco e ho lasciato asciugare. Con l'aiuto di una spugna per make up ho fatto un gradient utilizzando Kiko 361 e Kiko 355.
Ho tolto il lattice liquido e ho timbrato con la piastra acrilica Wedding Season 01 di Cici&Sisi e Konad 
nero...
Questa piastra in acrilico è disponibile  QUI e il prezzo è di 5,99.
Non perdete il video alla fine del post!


Wet n Wild French White Crème, Kiko 361, Kiko 355 and 
Konad Black


Cici&Sisi Wedding Season 01


The patterns that I choose.
--------
I modelli che ho scelto.


Video Tutorial:


What I used:

Cosa ho Usato:

  1. Base: Layla Rocky Nail
  2. Base Polish: Wet n Wild French White Crème
  3. Gradient Polishes: Kiko 361 and Kiko 355.
  4. Stamping Plate: Cici&Sisi Acrylic plate Wedding Season 01
  5. Stamping Polish: Konad Black
  6. Top coat:  Essence Quick Dry

Thanks for watching!!! ♥

Wednesday, 11 May 2016

Holographic Butterfly Manicure with Permanent Markers and Pueen Stamping Plate


Good day to everyone!!! Here is a Butterfly-Holo nail art made with permanent markers and a stamping 
plate from Pueen!!!
I applied two coats of Color Club Harp On It and I let to dry. I stamped with Konad Black and Pueen Nature Lover 02 (on ring finger and pinkie)...
For middle finger, index and thumb I made some stamping decals (in this way I get three mirror images). 
I stamped the image, I added one layer of top coat over the stamper and I let to dry...
When the decals  was almost perfectly dried I removed them and applied on my nails. I cleaned the cuticles and I applied the top coat.
On a plastic support  I painted with a red permanent marker. I added a drop of Isopropyl alcohol, I mixed with a thin brush and I started painting a rainbow with many other permanent markers!
You can find this plate HERE 
Don't miss the video tutorial at the end of this post!


Buona giornata a tutti !!! Ecco una nail art Farfalla-Holo realizzata con pennarelli indelebili e piastra di Pueen!!!
Ho applicato due mani di Color Club Harp On It e ho lasciato asciugare. Ho timbrato con Konad nero e Pueen Nature Lover 02 (su anulare e mignolo) ...
Per il dito medio, l'indice e il pollice ho fatto alcuni decals (in questo modo ottengo tre immagini speculari).
Ho timbrato l'immagine, ho aggiunto uno strato di top coat sullo stamper e ho lasciato asciugare ...
Quando gli adesivi erano quasi perfettamente asciutti li ho staccati e applicati sulle mie unghie. Ho pulito le cuticole e ho applicato il top coat.
Su un supporto di plastica ho dipinto con un pennarello indelebile rosso. Ho aggiunto una goccia di alcol isopropilico, ho mescolato con un pennello sottile e ho iniziato a dipingere un arcobaleno con molti altri pennarelli indelebili!
È possibile trovare questo piatto QUI
Non perdete il video tutorial alla fine di questo post!


Color Club Harp On and Konad Black


Pueen Nature Lover 02


The pattern that I choose.
--------
Il modello che ho scelto.


Sharpie Permanent Markers.


Video Tutorial:


What I used:

Cosa ho Usato:

  1. Base: Layla Rocky Nail
  2. Base Polish: Color Club Harp On
  3. Rainbow: Sharpie Permanent Markers.
  4. Stamping Plate: Pueen Nature Lover 02
  5. Stamping Polish: Konad Black
  6. Top coat:  Essence Quick Dry

Thanks for watching!!! ♥

Tuesday, 10 May 2016

Cici&sisi​ 15% Off Discount Code!


Hi girls!!!! Here's a discount offer as a gift for Mother's Day, though it is late :) 
You can obtain the 15% off  for the acrylic plates from Cici&sisi​ with the discount code Eleonora Palma, and the code can only be used 20 times!!!! So hurry!!! ❤
You can find these plates HERE


Ciao ragazze!!!! Eccovi  uno sconto offerto come regalo per la festa della mamma, anche se è in ritardo :)
È possibile ottenere il 15% di sconto per le piastre acriliche di Cici&Sisi con il codice sconto
Eleonora Palma, e il codice può essere utilizzato solo 20 volte!!!! Quindi affrettatevi !!! ❤
È possibile trovare queste piastre QUI


Friday, 6 May 2016

Asian Landscape Manicure with UberChic Beauty The Far East 02


Hi girls!!! Today I made an Asian Landscape on my nails and I used one of the new themed plates from UberChic Beauty! This plate is gorgeous and I found a picture on Google Images that inspired me for this mani!
First of all I applied two coats of white polish and I let it dry. 
Later, I prepared some gradient decals over The Mini Uber Mat from UberChic Beauty and I stamped some designs from the plate "The Far East 02" with Essence Stampy White.
I applied the decals on index, middle finger and thumb, while, for ring finger and pinkie I wanted mirror images to obtain a full bridge! So, I applied the gradient decals without images stamped and I prepared some decals over the mat with the same images...I peel off them , I reversed (to have the mirror image) and I applied on my nails.
Finally I prepared other decals using Konad black and I applied them almost exactly over the white images...In this way I obtained a "shadow effect"...
As final touch I added some dots with pink and white acrylic paints to make the cherry blossoms! ! 
Isn't so easy to explain...maybe the video tutorial at the end of the post can be of help! Q___Q
This plate is sold HERE and the Mini Uber Mat HERE


Ciao ragazze!!! Oggi ho fatto una manicure con paesaggio asiatico sulle mie unghie e ho usato una delle  nuove piastre a tema di  UberChic Beauty! Questa piastra è stupenda e ho trovato una foto su Google Immagini che mi ha ispirata per questa manicure!
Prima di tutto ho applicato due mani di smalto bianco e ho lasciato asciugare.
Poi, ho preparato alcuni  gradient decals sul Mini Uber Mat di UberChic Beauty e ho timbrato alcuni disegni della piastra "The Far East 02" con Essence Stampy bianco.
Ho applicato i decals su indice,  medio e  pollice, mentre, per anulare e mignolo desideravo immagini speculari per ottenere un ponte intero! Quindi, ho applicato i gradient decals senza immagini stampate e ho preparato alcuni decals sul tappetino con le stesse immagini... li ho staccati,  invertiti (per avere l'immagine speculare) e applicati sulle unghie.
Infine ho preparato altri decals usando Konad nero e li ho applicati quasi esattamente sulle immagini bianche ... In questo modo ho ottenuto un "effetto ombra" ...
Come tocco finale ho aggiunto alcuni puntini con colori acrilici bianco e rosa per fare i fiori di ciliegio!
Non è molto facile da spiegare... forse il video tutorial alla fine del post può essere d'aiuto! Q___Q
Questa piastra è in vendita QUI e il tappetino Mini Uber Mat QUI


The image that inspired me!
-------
L'immagine che mi ha ispirata!


Wet n Wild French White Crème, Kiko 295, 340, 297, 331, Konad Black and Essence Stampy white.


UberChic Beauty The Far East 02


The patterns that I choose.
--------
I modelli che ho scelto.


Video Tutorial:


What I used:

Cosa ho Usato:

  1. Base: Layla Rocky Nail
  2. Base Polish: Wet n Wild French White Crème
  3. Gradient Polishes: Kiko 295, 340, 297 and 331.
  4. Stamping Plate: UberChic Beauty The Far East 02
  5. Stamping Polish: Konad Black and Essence Stampy white.
  6. Dots: Acrylic paints pink and white.
  7. Top coat:  Essence Quick Dry

Thanks for watching!!! ♥