Showing posts with label Uber Mat. Show all posts

Monday, 22 May 2017

New Uber Mat from UberChic Beauty - Swatches and Review


Hi girls! I'm sure you already know the Uber Mat from UberChic Beauty
Today, I will show you the new Uber Mat that Brittany has launched!!! Respect to the previous one this mat has a new look!
The Uber Mat 2 has some fun icons, alphabet letters and numbers that you can fill in with your polish or glitter to make amazing nail art decals! 
There are also black nail guides into the middle and on lower left you can find a ruler that you can use, for example, to know if a design will fit your nails!
This mat allows you to keeping clean surfaces where you make your nail art!!! Not only... You can test your polishes, test out color combos, mix polishes, make dry marble, stamping decals directly on it and so on.....
It is very flexible and it measures 40,64 x 30,48 cm...Very big!!!
You can easily clean the mat with acetone or nail polish remover and a cotton pad...
Most of polishes doesn't stain the mat....but if they are highly pigmented (for example some Mundo de Unas stamping polishes)...it's better to test a small part on the side!


Technical features from the web shop:

What does it do? 

1. Easily test out color combos on your mat
2. Protect your table from stains and spills
3. Simple Cleanup: Acetone and Nail Polish Remover proof
4. Create easy peasy stamping decals with polish or glitter mixed with Top Coat
5. Reverse stamp like a boss
6. Super flexible for easy cleanup and storage
7. Dry Marble and Dry “Water” Marble like a pro (without the mess!)
8. It’s food-grade so you could literally eat off of it
9. Smoosh your polish and make a fun look
10. Measure a design to see if it will fit your nails...or use it for homework. But that's not as fun.
11. Create letters and numbers out of polish or glitter mixed with polish with absolute ease!
12. We just put this in here because we know we haven't covered everything you can do with this...

You can find the Uber Mat 2 HERE and the price it's $13.99. 
Don't miss the video tutorial below!!!


Ciao ragazze! Sono sicura che già conoscete il tappetino Uber Mat di  UberChic Beauty!
Oggi, vi mostrerò il nuovo Uber Mat 2 che Brittany ha lanciato!!! Rispetto al precedente, questo tappetino ha un aspetto nuovo!
Uber Mat 2 ha alcune icone divertenti, lettere dell'alfabeto e numeri che potete riempire con smalto o glitter per fare incredibili decals per nail art!
Nel mezzo sono presenti anche guide nere nere e in basso a sinistra si può trovare un righello che potete utilizzare, per esempio, per sapere se un disegno si adatta alle vostre unghie!
Questo tappetino permette di mantenere le superfici pulite dove fate le nail art !!! Non solo ... È possibile testare i vostri smalti, provare combinazioni di colore, miscelare smalti, fare dry marble, stamping decals direttamente su di esso e così via.....
E 'molto flessibile e misura 40,64 cm x 30,48...molto grande !!!
Potete facilmente pulire il tappetino con acetone o solvente per unghie e un batuffolo di cotone ...
La maggior parte degli smalti non macchia il tappeto.... ma se sono altamente pigmentati (per esempio alcuni smalti per stamping di Mundo de Unas)...è meglio testare una piccola parte sul lato!


Caratteristiche tecniche del negozio web:

A cosa serve?

1. Provare facilmente le combinazioni di colore sul tuo tappetino.
2. Proteggere il tuo tavolo dalle macchie e dalle fuoriuscite
3. Pulizia semplice: Acetone o Nail Polish Remover
4. Creare facili decals con smalto o glitter mescolato con Top Coat
5. Fare stamping reverse come un'esperta
6. Super flessibile per una facile pulizia e immagazzinaggio
7. Fare dry marble e dry water marble come un professionista (senza sporciziea e disordine!)
8. Il materiale è "per alimenti" in modo da poter letteralmente mangiare su di esso
9. Puoi mischiare i tuoi smalti e ottenere risultati divertenti
10. Misurare un disegno per vedere se si adatterà alle unghie ... o utilizzarlo per i compiti a casa. Ma non è così divertente.
11. Creare lettere e numeri fatti con smalto o con glitter mescolati con smalto con assoluta facilità!
12. Abbiamo scritto tutto ciò qui ma sappiamo che non abbiamo coperto tutto ciò che potresti fare con esso...

Potete trovare Uber Mat 2 QUI e il prezzo è di 13,99 dollari.
Non perdetevi il video tutorial qui sotto!!!


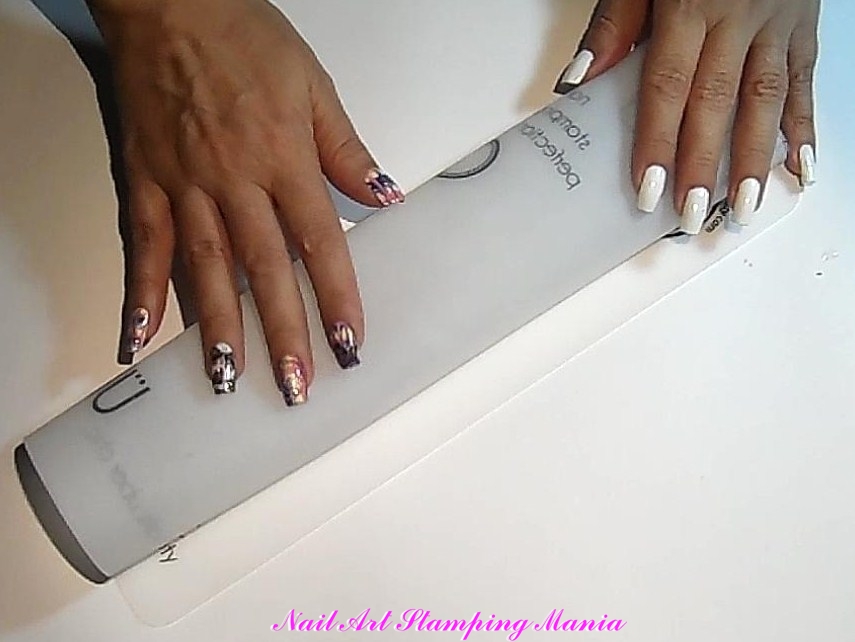
You can test polishes, stamping polishes, make dry water marble decals, stamping decals....
È possibile testare smalti, smalti per stamping, fare decals di dry water marble, stamping decals...


You can test out color combos, make drag marble decals and all which your creativity suggest you!
E' possibile testare combinazioni di colore, fare decals di drag marble e tutto quello che la tua creatività ti suggerisce!


With Uber Mat 2 you can create letters, numbers and icons with polishes or glitter mixed with clear polish!
Con Uber Mat 2 è possibile creare lettere, numeri e icone con smalti o glitter mescolati con smalto trasparente! 


 You can clear the mat with acetone (or nail polish remover) and cotton pads...
È possibile pulire il tappetino con acetone (o solvente per unghie) e batuffoli di cotone ...


When your manicure was completed you can remove the 
residues of nail polish  with acetone and a cotton pad and keep the mat for your next nail art!!!

Quando la vosta manicure è completata potete rimuovere i residui di smalto con acetone e un batuffolo di cotone   e conservare il tappetino per la prossima nail art !!!


Video Tutorial:


Thanks for reading!!! ♥
Grazie per la lettura!!! ♥

Wednesday, 20 April 2016

The UberChic Beauty Mini Uber Mats - Swatches and Review


Hi girls! As I promised, after the ÜC Collection 8 and the new ÜC Uber Mini plates, I will show you two other gems from the new products launched lately from UberChic Beauty....
I'm talking about the new Uber Mini Mats! 
About 8 or 9 months ago UberChic launched their Uber Mat  that measured 40,64 x 30,48 cm...Very big!!! They was the first one to create the nail art mat and now many brands have copied this great idea!
Now UberChic have created the mini version ( 22,8 x 20,3 cm) available in two colors: the classic clear and the black one (perfect for clear or pastel nail polishes)
As you already know with the mats you can test your polishes, test out color combos, mix  nail polishes for gradient manicure, make dry marble/drag marble, stamping decals (without the need to use so many stamper heads) and so on...
In this regard I want to remind that you can prepare your decals in advance and let on your mat also for more than one or two months and when you need them you must simply apply one layer of top coat over the decals so that they become flexible again  like the first day! 
When you stop to create your manicure you can removed the residues of nail polish  over the mats with acetone. 
Most of polishes doesn't stain the mat....but if they are highly pigmented (for example some Mundo de Unas stamping polishes)  it's better test a small part on the side to see if they do.
You can buy Uber Mini Mat clear HERE and Uber Mini Mat black HERE
The price is $7.99 for each.
Don't miss the video tutorial below!!!


Ciao ragazze! Come promesso, dopo la ÜC Collection 8 e le nuove piastre ÜC Uber Mini plates vi mostrerò altre due gemme tra i nuovi prodotti lanciati di recente da UberChic Beauty ....
Sto parlando dei nuovi Uber Mini Mats!
Circa 8 o 9 mesi fa UberChic lanciato il suo tappetino Uber Mat che misurava 40,64 x 30,48 cm ... Molto grande!!! Sono stati i primi a creare il tappeto per nail art e ora molte marche hanno copiato questa grande idea!
Ora UberChic ha creato la versione mini (22,8 x 20,3 cm) disponibile in due colori: il classico chiaro e quello nero (ideale per smalti chiari o pastello)
Come già sapete con i tappetini è possibile testare i vostri smalti, provare combinazioni di colore, miscelare smalti per unghie per manicure sfumate, fare Dry Marble o Drag Marble, stamping decal (senza la necessità di utilizzare tanti stamper) ecc...
A questo proposito voglio ricordare che è possibile preparare decals in anticipo e lasciare sul tappeto anche per più di uno o due mesi e quando ne avete bisogno dovete semplicemente applicare uno strato di top coat sopra i decals in ​​modo che diventino di nuovo flessibili come il primo giorno!
Quando smettete di creare la vostra manicure potete rimuovere i residui di smalto sui tappetini con acetone.
La maggior parte di smalti non macchia il tappeto .... ma se sono altamente pigmentati (come ad esempio alcuni smalti per stamping di  Mundo de Unas) è meglio testare una piccola parte sul bordo per vedere se lo fanno.
È possibile acquistare Uber Mini Mat chiaro QUI e Uber Mini Mat nero  QUI.
Il prezzo è di $ 7,99 per ciascuno.
Non perdete il video tutorial qui sotto !!!


Mini Uber Mat: Black


Mini Uber Mat: Clear


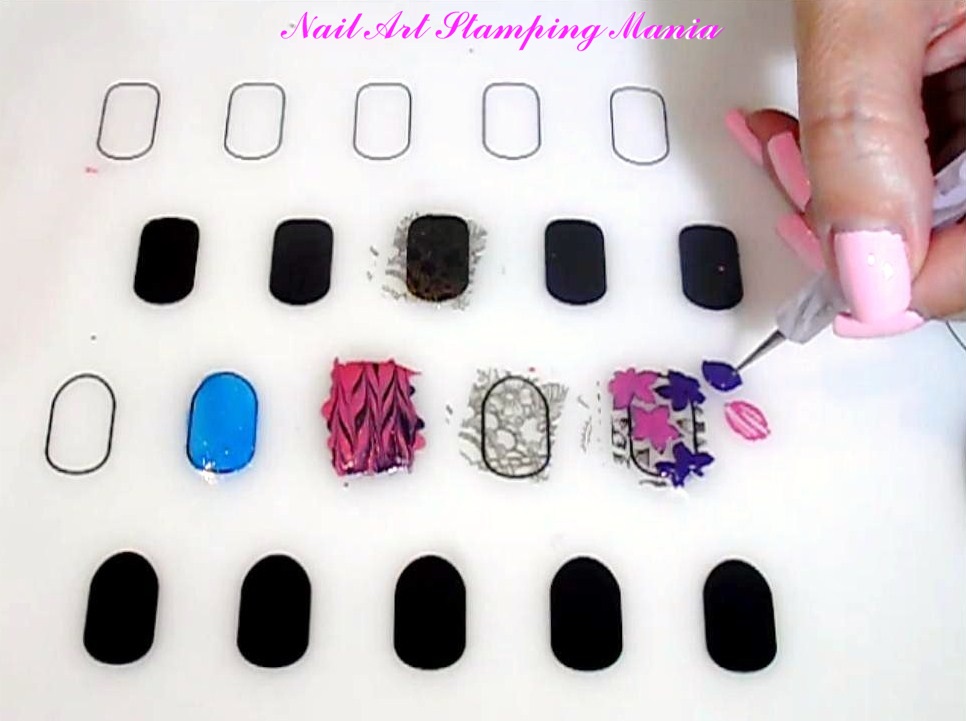
Here I prepared a stamping decal over Uber Mini Mat black.
I stamped with Essece Stampy white and I painted with nail 
polishes in different colors....
-------
Qui ho preparato uno stamping decal su Uber Mini Mat nero.
Ho stampato con Essece Stampy bianco e ho dipinto con 
smalti in diversi colori ....


...and here I prepared many stamping decals over Uber Mini Mat clear 
for my next manicure. This time I stamped with Essence Stampy black...
--------
....e qui ho preparato molti decals su Uber Mini Mat chiaro per la mia 
prossima manicure. Questa volta ho stampato con Essence Stampy nero...


For this stamping decal manicure I used Uber Mini Mat clear ...
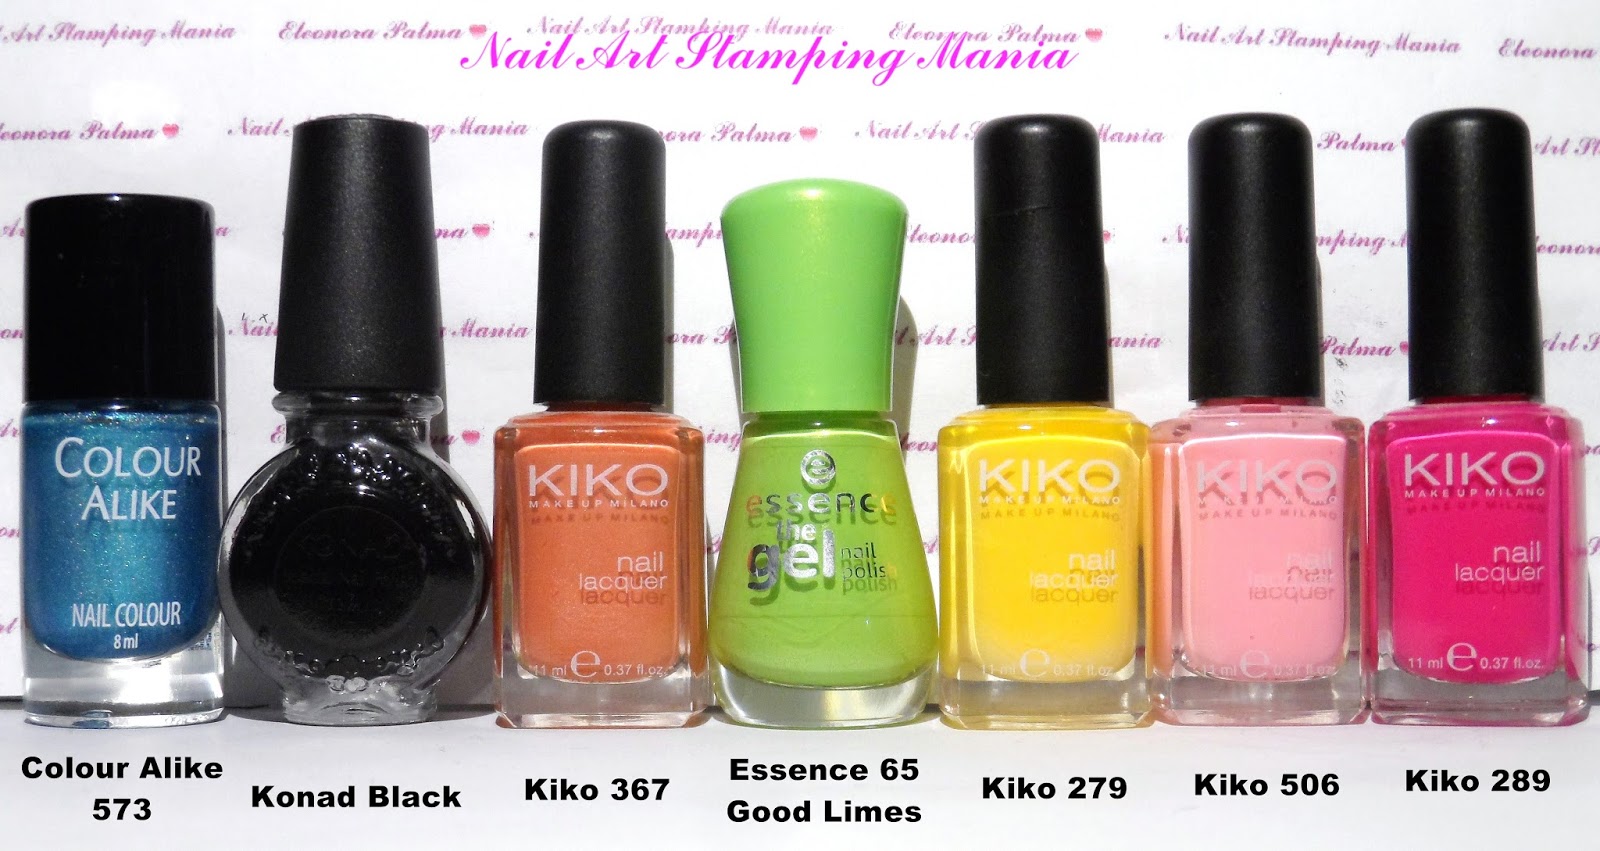
 I applied three coats of Colour Alike 573.
I stamped with ÜC Uber Mini - Succulents and Konad black.
Later I painted the decals with Kiko 367, Essence 65 Good Limes, 
Kiko 279, 506 and 289
------
 Per questa Stamping Decal manicure ho usato Uber Mini Mat chiaro...
Ho applicato tre mani di Colour Alike 573.
Ho stampato con ÜC Uber Mini - Succulents e Konad nero.
Poi ho dipinto i decal con Kiko 367, Essence 65 Good Limes, 
Kiko 279, 506 e 289


Video Tutorial:


What I used:

Cosa ho Usato:

  1. Base: Layla Rocky Nail
  2. Base Polish:  Colour Alike 573
  3. Stamping Plate: ÜC Uber Mini - Succulents 
  4. Stamping Polish: Konad Black
  5. Stamping Decal Polishes: Kiko 367, Essence 65 Good Limes, Kiko 279, 506 and 289
  6. Top coat:  Essence Quick Dry


Thanks for watching!!! ♥

Monday, 21 March 2016

One Stroke Technique With UberChic Uber Mat - Tutorial


Hi girls! Today I will show you my first attempt with the One Stroke Technique.
First of all I applied two coats of black polish (Layla CE 31). Later, I applied one layer of
magnetic polish that I previously created with clear polish and magnetic pigment brown. Immediately after I used the magnetic stick to create the cat eye effect...
When it dried I stamped with UberChic Beauty 4-03  plate and Supernova from Colour Alike.
At this point I started doing a purple rose with the One Stroke technique...I explained this technique in the video tutorial at the end of this post.
I used acrylic paints white and purple and a special One Stroke brush no. 04.
Since I'm at the beginnings with this technique I painted the roses over the silicone mat from  UberChic Beauty and not directly on my nails...in this way you can do all the attempts that you want and choose the best ones!!!
I applied one layer of top coat over the roses that I chosen and I let them dry for some minutes...Later, I peel off the "decals" and I applied onto my nails with a bit of top coat...
You can find the plate HERE and the mat HERE
Please, forgive me for this manicure... I hope to improve this technique with time!!! Q___Q


Ciao ragazze! Oggi vi mostrerò il mio primo tentativo con la tecnica One Stroke.
Prima di tutto ho applicato due mani di smalto nero (Layla CE 31). Più tardi, ho applicato uno strato di
smalto magnetico che ho creato in precedenza con dello smalto trasparente e del pigmento magnetico marrone. Subito dopo ho usato il bastone magnetico per creare l'effetto occhi di gatto ...
Quando si è asciugato ho timbrato con la piastra  UberChic Beauty 4-03 e Supernova di Colour Alike
A questo punto ho iniziato a fare una rosa viola con la tecnica One Stroke ... ho spiegato questa tecnica nel video tutorial alla fine di questo post.
Ho usato i colori acrilici biano e viola e un pennello speciale per One Stroke n. 04.
Dal momento che sono agli inizi con questa tecnica ho dipinto le rose sul tappetino in silicone di UberChic Beauty e non direttamente sulle mie unghie ... in questo modo si possono fare tutti i tentativi che si desidera e scegliere i migliori !!!
Ho applicato una mano di top coat sulle rose scelte e ho lasciato asciugare per qualche minuto ... Più tardi, ho staccato i "decals" e li ho applicati sulle mie unghie con un po' di top coat ...
È possibile trovare la piastra QUI e il tappetino QUI
Vi prego, perdonatemi per questa manicure ... spero di migliorare questa tecnica con il tempo!!! Q___Q


Layla CE 31, Franken polish (clear polish + magnetic powder brown),
Colour Alike Supernova and Acrylic Paints (White and purple).


UberChic Beauty 4-03 Plate


I stamped with UberChic Beauty 4-03  plate and 
Supernova from Colour Alike
--------
Ho stampato con la piastra UberChic Beauty 4-03 
e Supernova di Colour Alike


I painted the roses over Uber Mat  from UberChic Beauty...
---------
Ho dipinto le rose su Uber Mat di  UberChic Beauty...


I applied one layer of top coat and I let them dry for some minutes...
---------
Ho applicato una mano di top coat e ho lasciato asciugare per qualche minuto...


Later, I peel off the "decals" and I applied onto my nails.
-------
Poi ho staccato i "decals" e li ho applicati sulle mie unghie.


Video Tutorial:


What I used:

Cosa ho Usato:

  1. Base: Layla Rocky Nail
  2. Base Polish:  Layla CE 31 (two coats) 
  3. Polish: Franken polish (clear polish + magnetic powder brown)
  4. Stamping Plate: UberChic Beauty 4-03 Plate
  5. Stamping Polish: Colour Alike Supernova
  6. One Stroke: Acrylic Paints (White and purple)
  7. Top coat:  Essence Quick Dry


Thanks for watching!!! ♥

Monday, 3 August 2015

The UberChic Beauty Uber Mat - Swatches and Review


Hello Girls! In this post I will review a tool that you can't miss!!! It's "Uber Mat" from  UberChic Beauty
This mat allows you to keeping clean surfaces where you make your nail art!!! Not only... You can test your polishes, test out color combos, mix polishes, make dry marble, stamping decals directly on it and so on.....
It is very flexible and it measures 40,64 x 30,48 cm...Very big!!!
You can easily clean the mat with acetone or nail polish remover and a cotton pad...
Most of polishes doesn't stain the mat....but if they are highly pigmented (for example some Mundo de Unas stamping polishes)...they may stain!!! So it's better test a small part on the side...
I tested this mat for my recent manicure...I make some stamping decals and some dry marble directly over it. I used Wet n Wild French White Crème (as a base) , Kiko Quick dry 853, Kiko Quick dry 841, Kiko 332, Kiko Digital 437, UberChic Beauty 3-01 and Konad black. 
I waited 'till  the decals was dry I removed them and applied on my nails...
When my manicure was completed I  removed the residues of nail polish  with acetone  and I have kept  the mat for my next nail art!!! 
You can find this gem here...Due to overwhelming demand, this product is out of stock and a restock date is expected for late August so if you’d like to know the moment they are back in stock click here.
Don't miss the video tutorial below!!!


Ciao ragazze! In questo post vorrei recensire uno strumento che non può mancare!!! Si tratta di  "Uber Mat" di  UberChic Beauty!
Questo tappetino permette di mantenere le superfici pulite dove fate le nail art !!! Non solo ... È possibile testare i vostri smalti, provare combinazioni di colore, miscelare smalti, fare dry marble, stamping decals direttamente su di esso e così via.....
E 'molto flessibile e misura 40,64cm x 30,48 ... molto grande !!!
Potete facilmente pulire il tappeto con acetone o solvente per unghie e un batuffolo di cotone ...
La maggior parte di smalti non macchia il tappeto .... ma se sono altamente pigmentati (per esempio alcuni smalti per stamping di Mundo de Unas)... si può macchiare !!! Quindi è meglio testare una piccola parte sul lato ...
Ho provato questo tappetino per la mia recente manicure ... Ho fatto alcuni stamping decals e dry marble  direttamente su di esso. Ho usato Wet n Wild French White Crème (come base), Kiko Quick dry 853, Kiko Quick dry 841, Kiko 332, Kiko Digital 437,  UberChic Beauty 3-01 e Konad nero.
Ho aspettato fino a quando i decals si sono asciugati  e li ho staccati e applicati sulle mie unghie ...
Quando ho completato la mia manicure... ho rimosso i residui di smalto con acetone e ho conservato il tappetino per la prossima nail art !!!
Potete trovare questo gioiello qui  ... A causa della grande richiesta, il prodotto è esaurito e una data di rifornimento è previsto per la fine di agosto, quindi se si desidera conoscere il momento in cui sono tornati in magazzino cliccate qui.
Non perdetevi il video tutorial qui sotto !!!


Uber Mat from UberChic Beauty


You can test your polishes...
-----
Potete provare i vostri smalti


...test out color combos...(for example polish + glitter topper or 
holo topper)...
-----
...provare le combinazioni di colori...(ad esempio smalto + 
topper glitter o topper holo)...


..make dry marble and stamping decals...
-----
....fare dry marble e stamping decals...


... mix polishes and so on...
----
...mescolare smalti ecc...


...and when your manicure was completed you can remove the 
residues of nail polish  with acetone and a cotton pad...
--------
....e quando la vosta manicure è completata potete rimuovere 
residui di smalto con acetone e un batuffolo di cotone....


  and keep the mat for your next nail art!!!
-------
  e conservare il tappetino per la prossima nail art !!!


Wet n Wild French White Crème ,Kiko Quick dry 853, 
Kiko Quick dry 841, Kiko 332, Kiko Digital 437
and Konad black


UberChic Beauty 3-01


Video Tutorial:


What I used:

Cosa ho Usato:
  1. Base: Layla Rocky Nail
  2. Base Polish: Wet n Wild French White Crème 
  3. Nail Polishes: Kiko Quick dry 853, Kiko Quick dry 841, Kiko 332 and Kiko Digital 437
  4. Stamping Plate: UberChic Beauty 3-01
  5. Stamping Polish: Konad Black
  6. Stamping Decal Polishes: Kiko Quick dry 853, Kiko Quick dry 841, Kiko 332 and Kiko Digital 437
  7. Top coat:  Essence Quick Dry