Showing posts with label HOLOGRAPHIC NAIL POLISHES. Show all posts

Thursday, 18 August 2016

UberChic Beauty Collection 11 - Swatches And Review


Hello Ladies!Today I have the eleventh collection from UberChic Beauty to share with you!
This set contains three plates that measure 9.5 x 14.6 cm each.
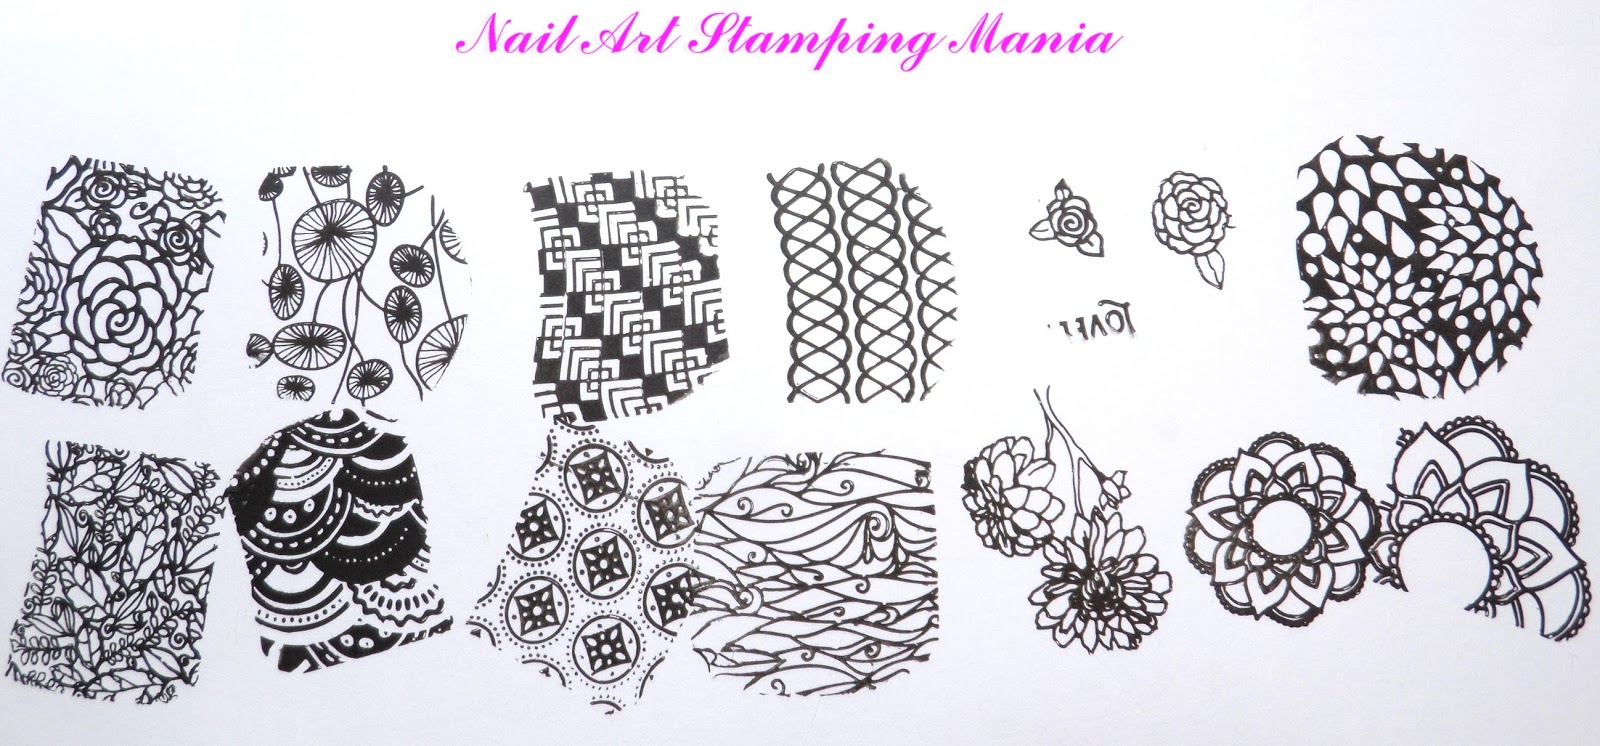
In these plates there are a lot of mandala images, geometric image, flowers, small individual roses, swirls, negative spaced images and so on!
There are full nail images that measure 2.1 cm x 1.7 cm, large multi-nail images and smaller individual images.  Each plate comes with a protective backing as well as a blue film that must be removed before use. The quality is excellent as always!
The UberChic Beauty Collection 11 nail stamping plates can be purchased HERE .
The price is $24.99 for the entire set + shipping cost.
Remember that you can find UberChic Beauty also here:
Instagram
Facebook
Facebook Groups
Pinterest
Now, I let you with all images and with the video tutorial!!!


Ciao signore! Oggi ho l'undicesima Collezione di UberChic Beauty da condividere con voi!
Questo set contiene tre piastre che misurano 9,5 x 14.6 cm ciascuno.
In queste piastre ci sono un sacco di immagini mandala, immagini geometriche, fiori, piccole rose singole, turbinii, immagini "negative space" e così via!
Ci sono immagini a grandezza intera che misurano 2,1 cm x 1,7 cm, grandi immagini multi-unghie e piccole immagini singole. Ciascuna piastra è dotata di una protezione sul retro, nonché una pellicola blu che va rimossa prima dell'uso. La qualità è eccellente come sempre! 
La Collezione 11 di UberChic Beauty può essere acquistata QUI.
IIl prezzo è di $ 24,99 per l'intero set + spese di spedizione.
Ricorda che puoi trovare UberChic Beauty anche qui:

Ora, vi lascio con tutte le immagini e con il video tutorial !!!


The back of these plates is protected with paper and the blue film must be removed before use!!!
---------
La parte posteriore di queste piastre è protetta con carta e la pellicola blu deve essere rimossa 
prima dell'uso !!!


Each plate measures 14.6 cm x 9.5 cm and almost all the images 
measure 2.1 cm x 1.7 cm
-------
Ogni piastra misura 14.6 cm x 9.5 cm e quasi tutte le immagini 
 misurano 2.1 cm x 17 cm


UberChic Beauty 11-01


UberChic Beauty 11-02


UberChic Beauty 11-03


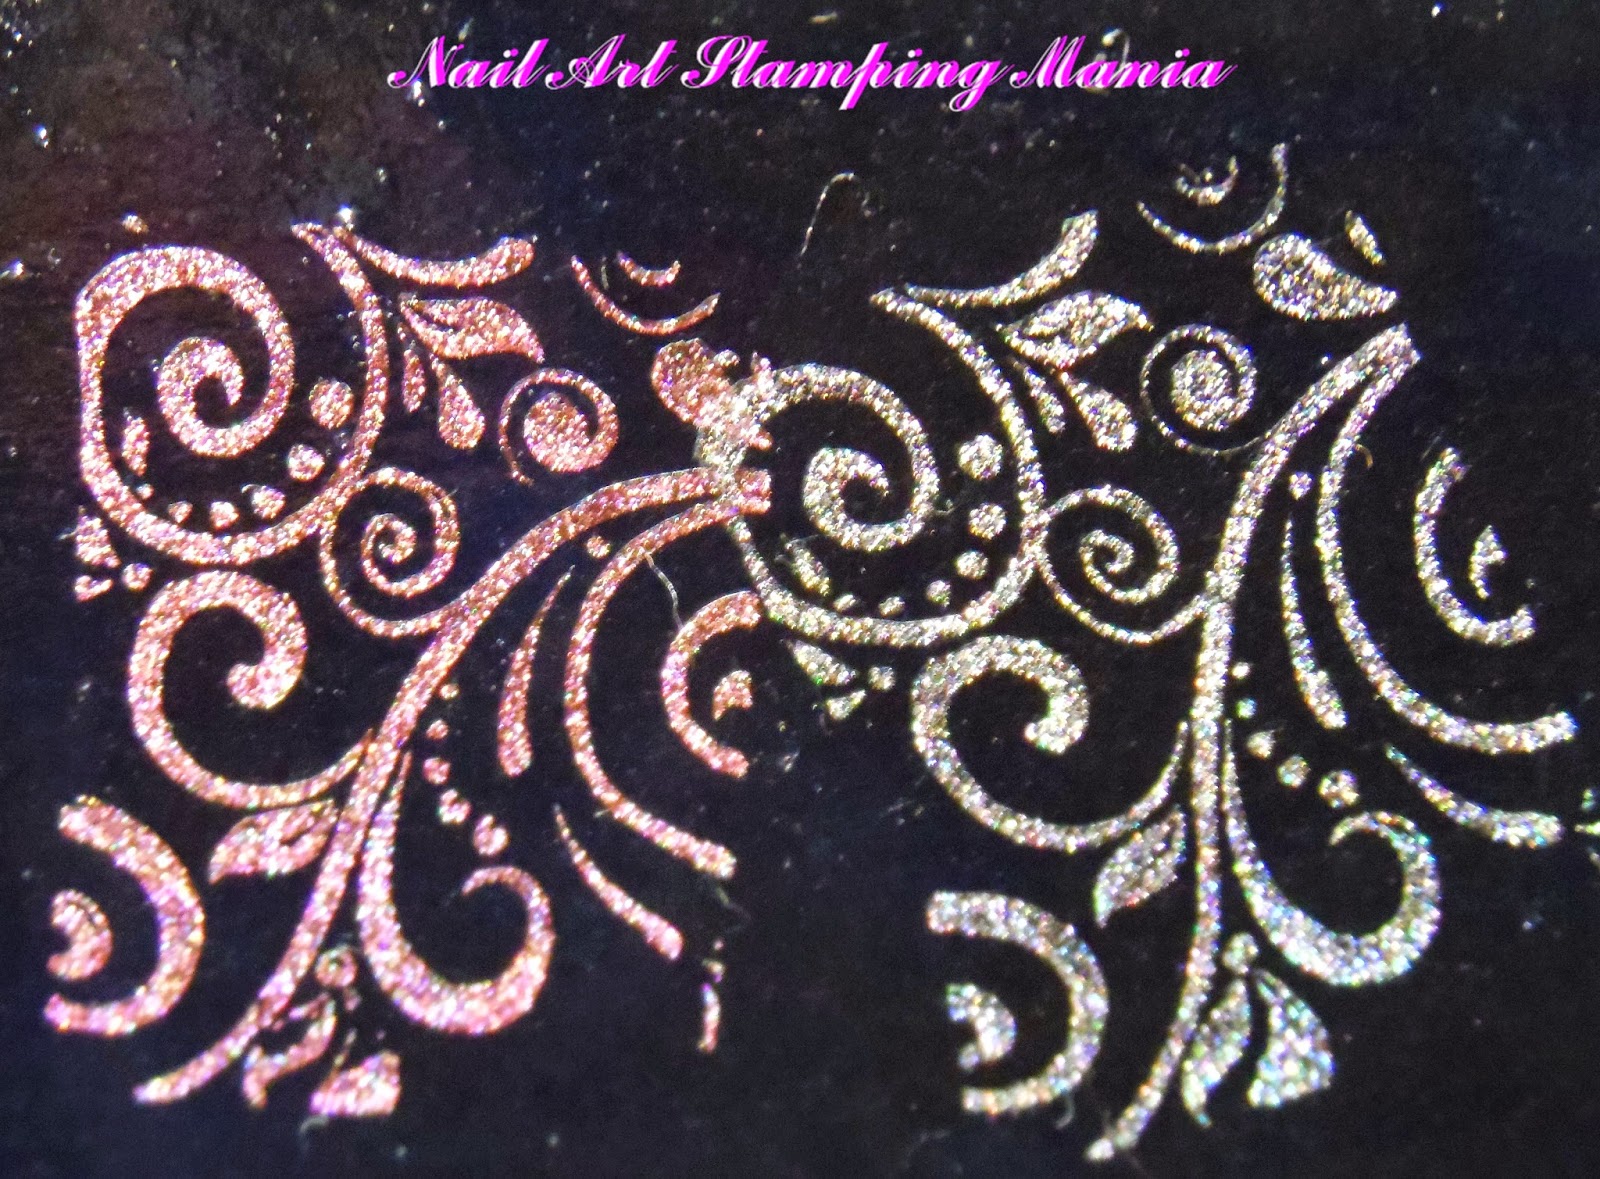
I tested some designs with Essence Stampy Black
---------
Ho testato alcune immagini con Essence Stampy nero


For this Stamping Decal  manicure I applied two coats of F.U.N Lacquer Mowed Meadow
I made a stamping decalwith UberChic Beauty 11-01 and MdU 65 Lime. Later, I filled 
the decal with Kiko 491. Finally I added a stud on ring finger.
------
 Per questa manicure Stamping Decal ho applicato due mani di F.U.N Lacquer Mowed Meadow
Ho fatto un decal con UberChic Beauty 11-01 e MdU 65 Lime. Poi, ho riempito
il decal con Kiko 491. Infine ho aggiunto una borchietta sull'anulare.


Video Tutorial:


What I used:

Cosa ho Usato:


  1. Base: Layla Rocky Nail
  2. Base Polish: F.U.N Lacquer Mowed Meadow
  3. Stamping Plate: UberChic Beauty 11-01
  4. Stamping Polish: MdU 65 Lime.
  5. Stamping Decal Polish: Kiko 491.
  6. Nail Art Decorations: Some golden studs.
  7. Top coat:  Essence Quick Dry


Thanks for reading!!! ♥


Grazie per la lettura!!! ♥


Wednesday, 16 September 2015

LeadLight Technique Manicure With UberChic Beauty Plate


Hi girls! I'm here again with a LeadLight manicure. I was inspired from a beautiful nail art by Tartofraises
I started with three coats of  Astra Holo 703. On middle and ring finger  I stamped with UberChic Beauty  4-03 and Yes Love 337 + white pigment.
After that, I painted with Alcohol Ink: Blue and Magenta diluted with Alcohol Isopropyl.
I added some golden and white dots (Kiko Mirror 628 and white polish). I completed the manicure with some iridescent rhinestones.
UberchicBeauty 4-03 is available Here 
You can find a short video at the end of the post!


Ciao ragazze! Sono ancora qui con una manicure LeadLight. Sono stata ispirata da una bella nail art di Tartofraises.
Ho iniziato con tre mani di Astra  Holo 703.  Sul dito medio e l'anulare ho timbrato con   UberChic Beauty     4-03 e Yes Love 337 + pigmento bianco.
Dopo di che, ho dipinto con inchiostro ad Alcol:  Blu e magenta diluiti con alcool isopropilico.
Ho aggiunto alcuni punti d'oro e bianchi (Kiko specchio 628 e smalto bianco). Ho completato la manicure con alcuni strass iridescenti.
UberchicBeauty 4-03 è disponibile Qui 
È possibile trovare un breve video alla fine del post! 


Astra Holo 703, Yes Love 337 + white pigment, Blue Alcohol Ink + Isopropyl Alcohol, Magenta Alcohol Ink + Isopropyl Alcohol, Kiko Mirror 628 and some Iridescent Rhinestones.


UberchicBeauty 4-03


Instagram Video Tutorial (You can follow me on Instagram    here):
---------
Instagram Video Tutorial (Potete seguirmi su instagram qui):


What I used:

Cosa ho Usato:

  1. Base: Astra Holo 703
  2. Stamping Plate:  UberchicBeauty 4-03 
  3. Stamping Polish: Yes Love 337 + white pigment
  4. LeadLight Polishes: Blue Alcohol Ink + Isopropyl Alcohol, Magenta Alcohol Ink + Isopropyl Alcohol, Kiko Mirror 628 and Yes Love 337.
  5. Nail Art Decoration: Some Iridescent Rhinestones.
  6. Top coat:  Essence Quick Dry

Friday, 26 September 2014

Colour Alike 518 And Pueen Encore Plate


Hi Everyone! 
Here is a Stamping Mani I created using Pueen Encore SE04B! What are the colors I used? As  base coat I have chosen Colour Alike 518, while as stamping polish I used a franken polish that I made some days ago....It's funny try to create nail polishes!!!! 
You never know what can be the results *___*. I added the top coat and some rhinestones...et voilà!!!


 Ciao a tutti! 
Ecco una Stamping Mani che ho creato utilizzando Pueen Encore SE04B! Quali sono i colori che ho usato? Come mano di fondo ho scelto Colour Alike 518, mentre come smalto per stampare ho usato un franken polish che ho fatto qualche giorno fa .... E 'divertente cercare di creare smalti !!!! 
Non sai mai quale sarà  il risultato * ___ *. Ho aggiunto il top coat e alcuni strass ... et voilà !!!


Colour Alike 518


Colour Alike 518 and a franken polish


Pueen SE04B


What I used:

Cosa ho Usato:

  1. Base: Colour Alike 518
  2. Stamping Plate: Pueen Encore SE04B
  3. Stamping Special Polish: Franken polish light coral
  4. Top coat: Essence Quick Dry and then Essence Gel Look 

Have a nice weekend!!!!

Sunday, 24 August 2014

BeYu Holographic Polishes: Swatches And Review


Hi holo lovers!!!! Some weeks ago I find some holographic polishes in a Douglas perfume shop. They are from a German brand called BeYu.  There was five colors:  "Silver Illusion" 991, "Grey Illusion" 992,  "Berry Illusion" 993,  "Mauve Illusion" 994  and "Champagne Illusion" 995. I chosen only two of them, Grey and Berry Illusion. They are  scattered holos easy to apply and covering almost at the first coat. They don't need a special base and they last much...I removed them after 3 days (only because I  wanted to change polish!)  and I only had some minor tip wear and no chipping at all! The effect holo is not so evident (I prefer linear holos) and the colors aren't so original but I'm an holo fan and I couldn't resist not even to them!!!!!


Ciao a tutti!! Qualche settimana fa ho trovato alcuni smalti olografici in una profumeria Douglas. Si tratta di una marca tedesca chiamata BeYu. C'erano cinque colori:  "Silver Illusion" 991, "Grey Illusion" 992,  "Berry Illusion" 993,  "Mauve Illusion" 994  and "Champagne Illusion" 995. Ho scelto solo due di loro, Grey e Berry Illusion. Sono olografici scattered (con particelle holo "sparpagliate") facili da applicare e che coprono quasi alla prima mano. Non hanno bisogno di una base speciale e durano molto ... li ho tolti dopo 3 giorni (solo perché volevo cambiare smalto!) e ho avuto solo qualche segno di usura sulle punte e nessuna scheggiatura! L'effetto ologramma non è così evidente (io preferisco gli olografici  lineari) ed i colori non sono così originali, ma  sono una fan di Holos e non ho potuto resistere nemmeno a loro!!!!!


Grey Illusion 992 and Berry Illusion 993


Here are the swatches of Grey Illusion 992 and Berry Illusion 993. I gave two coats for each. No top coat.


Ecco gli swatches di Grey Illusion 992 e Berry Illusion 993. Ho dato due mani per ciascuno. Niente top coat. 


BeYu - Grey Illusion 992  


Berry Illusion 993
I think that this polish is a  bit more effected than the previous.
Penso che questo smalto è un po 'più effettato rispetto al precedente 


Here I made a stamping test with them....
Qui ho provato a timbrare con essi ....


...and here I stamped over black.
...e qui ho timbrato su nero.


What do you think about them? Let me know *___*

Che ne pensate? Fatemi sapere *___*


Thursday, 24 July 2014

China Glaze He's Going In Circles and Konad Plate


Hello my lovelies! For today's manicure I used a Konad plate  and  a discontinued holographic nail polish. It's  China Glaze "He's Going In Circles" from Kaleidoscope collection. The summer is perfect for holos and this green is so summery!!! I simply added some studs, while, on middle and ring finger I applied a stamping decal that I made with Konad m100 and Konad SP black. I filled the decal with Layla Thermo Polish Effect 02. Top coat for finishing.


Ciao mie care! Per la manicure di oggi ho usato un piatto Konad e uno smalto olografico fuori produzione. Si tratta di China Glaze  "He's Going In Circles" dalla collezione Kaleidoscope. L'estate è perfetta per gli smalti olografici e questo verde è davvero estivo! Ho semplicemente aggiunto alcune borchie, mentre, sul dito medio e anulare ho applicato uno stamping decal che ho fatto con Konad m100 e Konad SP (special polish) nero. Ho riempito la decalcomania con  Layla Thermo Polish Effect 02. Top coat per la finitura. 


 China Glaze  He's Going In Circles, Layla Thermo Polish Effect 2,
Konad black and some studs.


konad m100


What I used:

Cosa ho Usato:

  1. Base: China Glaze  He's Going In Circles
  2. Stamping Plate: Konad m100
  3. Stamping Special Polish: Konad black 
  4. Polishes for Stamping Decal: Layla Thermo Polish Effect 2
  5. Top coat: Essence Quick Dry and then Essence Gel Look 

Have a nice day!!!!!