Showing posts with label Permanent Markers. Show all posts

Tuesday, 6 November 2018

Fall Manicure - How to Stamp with Permanent Markers and Mirror Polish


Hi Everyone! Today I will show you how to stamp with Permanent Markers and Mirror/Metal stamping polishes!
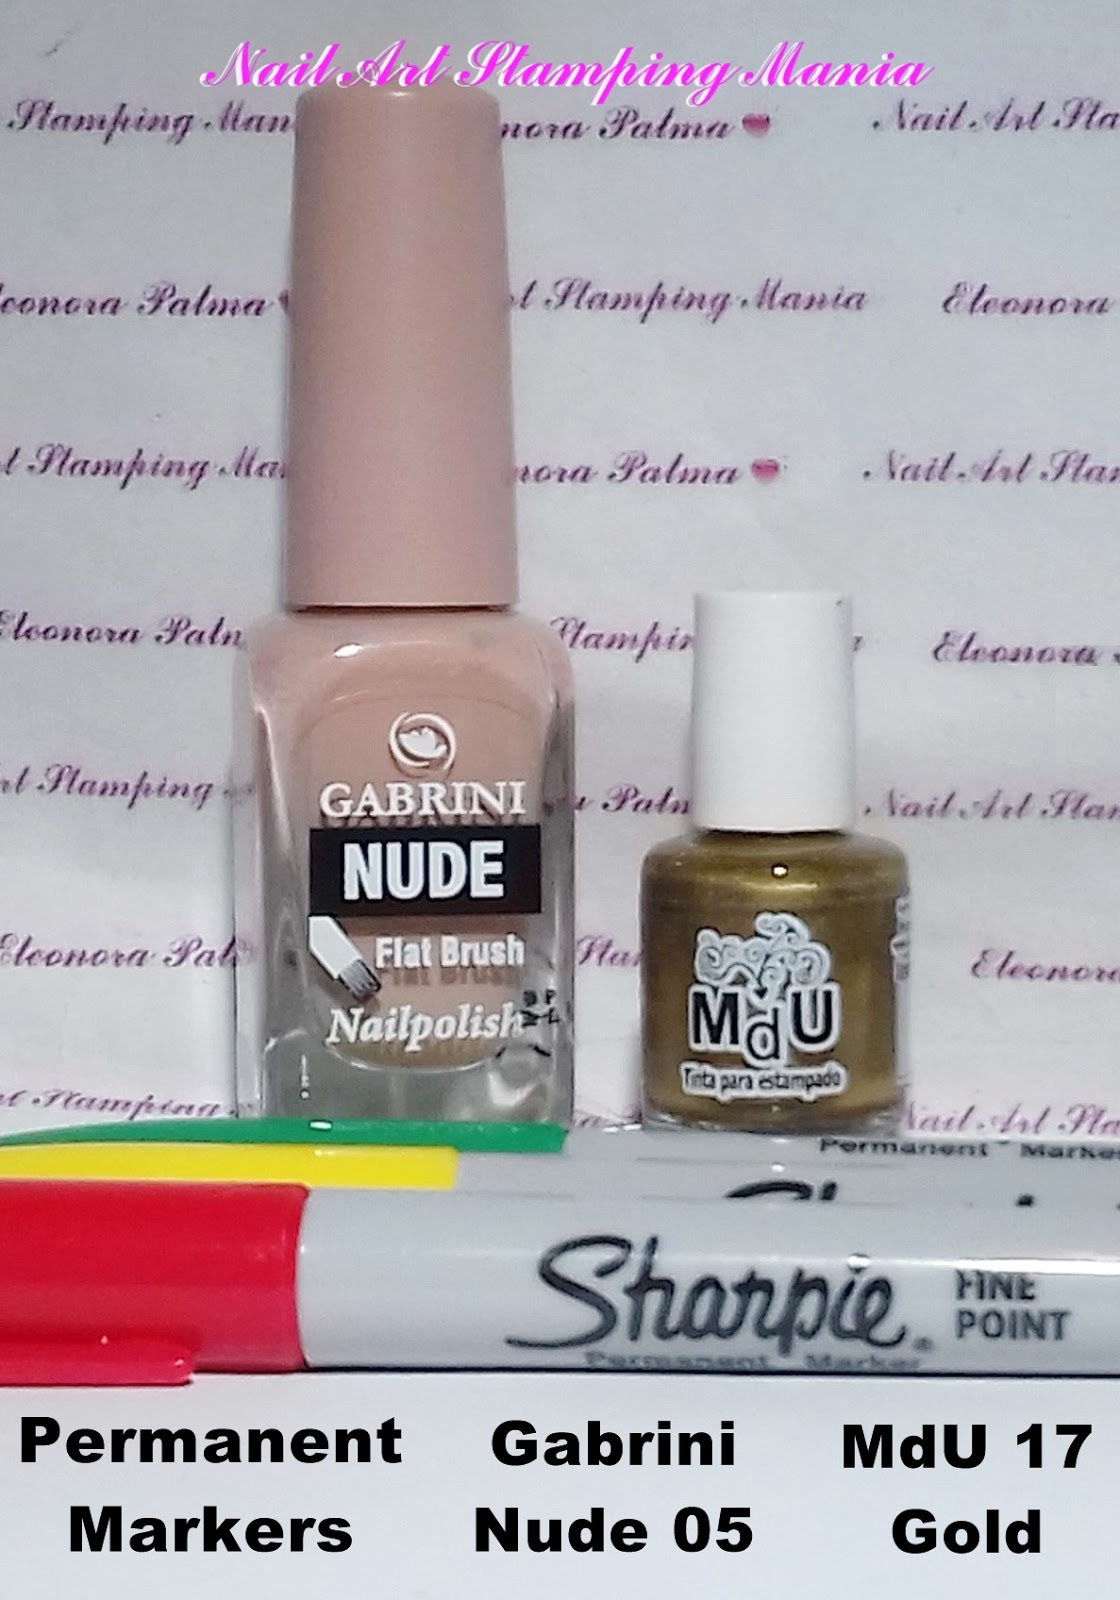
First of all I applied two layers of nude polish (Gabrini Nude 05).
Later, I painted the leaves with Permanent Markers: Red, yellow and green.
After that, I stamped with the stamping polish MdU 17 Gold. In this way you obtain
the image stamped with a metal effect!
Finally, I applied waterbased top coat from Essence.
Don't miss the video tutorial at the end of this post!

P.S.  It works also with regular mirror/metal polishes.


Ciao a tutti! Oggi vi mostrerò come stampare con pennarelli indelebili e smalti per stamping per Mirror/Metal!
Prima di tutto ho applicato due mani di smalto nude (Gabrini Nude 05).
Poi, ho dipinto le foglie con i pennarelli indelebili: rosso, giallo e verde.
Successivamente, ho stampato con lo smalto per stamping MdU 17 Gold. In questo modo si ottiene
l'immagine stampata con un effetto metallico!
Alla fine ho applicato il top coat a base d'acqua di Essence.
Non perdete il video tutorial alla fine di questo post!

P.S.  Funziona anche con smalti a mirror/metal normali.


Born Pretty BPL-024 

The pattern that I chosen!
-------
Il disegno che ho scelto!


Video Tutorial:


What I used:

Cosa ho Usato:

  1. Base: Base Coat UV.
  2. Base Polish: Gabrini Nude 05.
  3. Stamping Plate: Born Pretty L-024.
  4. Stamping Polish: MdU 117 Gold.
  5. Permanent Markers: Sharpie red, green and  yellow.
  6. Top coat: Essence Waterbased Top Coat "Blossom  Dream".

Thanks for watching!!! ♥
Grazie per la visione!!! ♥

Saturday, 24 December 2016

Christmas Lights Manicure with UberChic Beauty Christmas plates - Tutorial


Hi ladies! Here is another Christmas manicure made with LeadLight technique.
I used  three layers of a polish with holo glitters as a base. I stamped with two stamping plates from UberChic Beauty : ÜC Christmas-01 and 02. I used the Christmas lights images and I stamped them with Colour Alike "Kind of Black S".
Later, I simply painted with some permanent markers (yellow, green, magenta and blue).
UberChic Beauty Christmas-01 plate is sold HERE and UberChic Beauty Christmas-02  is available HERE!
Don't miss my video tutorial at the end of the post!!!


Ciao ragazze! Ecco un'altra manicure di Natale fatta con la tecnica LeadLight.
Ho usato tre mani di uno smalto con glitter olografici come base (L'Oreal Jet-Set 003) . Ho timbrato con due piastre di UberChic Beauty: ÜC Christmas-01 e 02. Ho usato le immagini delle luci di Natale e le ho timbrato con Colour Alike "Kind of Black S".
Poi, ho semplicemente dipinto con alcuni pennarelli permanenti (giallo, verde, magenta e blu).
La piastra UberChic Beauty Christmas-01 è venduta QUI e UberChic Beauty Christmas-02 è disponibile QUI.
Non perdete il mio video tutorial alla fine del post!!!


UberChic Beauty Christmas-02


UberChic Beauty Christmas-01


Video Tutorial:


What I used:

Cosa ho Usato:

  1. Base: Layla Rocky Nail
  2. Base Polish: L'Oreal Jet-Set 003
  3. Stamping Plates:  UberChic Beauty Christmas-01 and 02
  4. Stamping Polish: Colour Alike Kind of Black S
  5. LeadLight: Permanent Markers
  6. Top coat:  Essence Quick Dry


Thanks for reading!!! ♥
Grazie per la lettura!!! ♥


Saturday, 17 December 2016

UberChic Beauty Numbers-01 Plate and New Year's Day Manicure - Review and Tutorial


Hello girls! Today I wish to talk about a stamping plate by UberChic Beauty dedicated to numbers!
This plate was released many time ago but I think it's perfect for celebrate the New Year.  Obviously, you can use it each time you need celebrate an important date!!!
In this plate you can find different kinds of numeric font, as well as , other fonts and some words perfect for a special date!
The size of the plate is 9.5 cm by 14.5 cm and all images are well engraved!
UberChic Beauty Numbers-01  is available HERE and the price is $14.99 + shipping cost.
Now, I let you with the images and with the video tutorial!!!


Ciao ragazze! Oggi desidero parlarvi di una piastra di UberChic Beauty dedicata a numeri!
Questa piastra è uscita molto tempo fa, ma penso che sia perfetta per festeggiare il nuovo anno. Ovviamente, è possibile utilizzarla ogni volta che è necessario celebrare una data importante!!!
In questa piastra si possono trovare diversi tipi di caratteri numerici, così come altri tipi di caratteri e alcune parole perfette per una data speciale!
La dimensione della piastra è di 9,5 cm per 14,5 cm e tutte le immagini sono ben incise!
UberChic Beauty Numbers-01 è disponibile QUI e il prezzo è $ 14,99 + spese di spedizione.
Ora, vi lascio con le immagini e con il video tutorial !!!


This plate measures 14.6 cm x 9.5 cm
-------
Questa piastra misura 14.6 cm x 9.5 cm


UberChic Beauty Numbers-01


I tested the images with Essence Stampy Black
---------
Ho testato le immagini con Essence Stampy nero


For this manicure I used three layer of holo glitter polish. 
I stamped with some patterns of this plate and Konad black. 
Later, I painted with some permanent markers.
------
Per questa manicure ho usato tre mani di smalto con glitter holo . 
Ho timbrato con alcuni modelli di questa piastra e Konad nero. 
Poi, ho dipinto con alcuni pennarelli indelebili.


Video Tutorial:


What I used:

Cosa ho Usato:

  1. Base: Layla Rocky Nail
  2. Base Polish: L'Oreal Jet-Set 003
  3. Stamping Plate:  UberChic Beauty Numbers-01
  4. Stamping Polish: Konad Black
  5. Layered Polishes: Permanent Markers
  6. Top coat:  Essence Quick Dry


Thanks for reading!!! ♥
Grazie per la lettura!!! ♥


Saturday, 3 December 2016

Roses and Canary Manicure with LeadLight technique - Tutorial


Hey there! In this post I will show you a floral manicure made with LeadLight Technique and an AliExpress plate. 
As a base I used two coats of white polish and I stamped with OS-02 plate and Essence Stampy Black. Later, I painted with Sharpie permanent markers of many colors.
This plate is available HERE
For more details don't miss the video tutorial!!!


Ehilà! In questo post vi mostrerò una manicure floreale realizzata con la tecnica LeadLight e una piastra di AliExpress.
Come base ho usato due mani di smalto bianco e ho timbrato con la piastra OS-02 ed Essence Stampy nero.
Poi, ho dipinto con pennarelli permanenti Sharpie di molti colori.
Questa piastra è disponibile  QUI
Per maggiori dettagli non perdete  il video tutorial !!!


OS-02


The patterns that I choose
--------
I modelli che ho scelto


Video Tutorial:


What I used:

Cosa ho Usato:

  1. Base: Layla Rocky Nail
  2. Base Polishes: Wet n Wild French White Crème 
  3. Stamping Plate:  AliExpress OS-02 plate.
  4. Stamping Polish: Essence Stampy Black
  5. LeadLight: Permanent Markers
  6. Top coat:  Essence Quick Dry


Thanks for reading!!! ♥
Grazie per la lettura!!! ♥

Sunday, 9 October 2016

Keys Manicure with Creative Shop plate - Tutorial


Hi girls! Here is my first manicure with Creative Shop stamping plate!
I used the vintage keys and keyhole from Creative Shop 34 plate.
For this manicure I used two coats of Essence "Bloggers' Beauty Secrets" 04 Shine  Bright.
I used the Stamping Decal technique and I stamped with Konad brown and painted the decal with a golden  permanent marker to give a more vintage look.
This plate is sold directly by Creative Shop or is distributed internationally by Beautometry.
Here are others dedicated retailers:


Ciao ragazze! Ecco la mia prima manicure fatta con una piastra di Creative Shop!
Ho usato le chiavi e i buchi della serratura d'epoca della piastra Creative Shop 34.
Per questa il manicure ho usato due mani di  Essence "Bloggers' Beauty Secrets" 04 Shine  Bright. 
Ho usato la tecnica dello Stamping Decal e ho timbrato con Konad marrone e dipinto il decal con un pennarello indelebile dorato per dare un aspetto più vintage.
Questa piastra è venduta direttamente da Creative Shop o è distribuita a livello internazionale 
Ecco altri rivenditori dedicati:


Creative Shop 34


The patterns that I chosen


What I used:

Cosa ho Usato:


  1. Base: Layla Rocky Nail
  2. Base Polish: Essence "Bloggers' Beauty Secrets" 04 Shine  Bright
  3. Stamping Plate: Creative Shop 34
  4. Stamping Polish:  Konad Brown
  5. Stamping Decal: Permanent Marker Sharpie Gold Metallic
  6. Top coat:  Essence Quick Dry


Thanks for watching!!! ♥

Monday, 1 August 2016

Rainbow Manicure With Acrylic Stamping Plate from Cici&Sisi and Permanent Markers


Hi to everyone!!! Today I made a Rainbow Manicure with the new Acrylic stamping plate Wedding Season 01 from  Cici&Sisi!
I applied two coats of Color Club "Harp On It" and when it dried I painted the nails with Sharpie red, yellow, green, light blue, blue and purple.
I sprayed with isopropyl alcohol to get an homogeneous effect and I applied the top coat.
Later, I stamped with Cici&Sisi Wedding Season plate and Essence Stampy White.
Finally, I applied the top coat!
This Acrylic Plate is available  HERE and the price is 5.99.
You will find the video tutorial below!


Ciao a tutti!!! Oggi ho fatto una manicure arcobaleno con la nuova piastra in Acrilico Wedding Season 01  di 
Ho applicato due mani di Color Club "Harp On It" e quando si sono asciugate ho dipinto le unghie con pennarelli indelebili rosso, giallo, verde, azzurro, blu e viola.
Ho spruzzato con alcool isopropilico per ottenere un effetto omogeneo e ho applicato il top coat.
Poi ho timbrato con la piastra Cici&Sisi Wedding Season ed Essence Stampy bianco.
Infine, ho applicato il top coat!
Questa piastra in acrilico è disponibile QUI e il prezzo è di 5,99. 
Troverete il video tutorial qui sotto!


Color Club "Harp On It" and Essence Stampy White


Sharpie Permanent Marks


Cici&Sisi Wedding Season 01


The pattern that I choose.
--------
Il modello che ho scelto.


Video Tutorial:


What I used:

Cosa ho Usato:

  1. Base: Layla Rocky Nail
  2. Base Polish: Color Club "Harp On It"
  3. Stamping Plate: Cici&Sisi Acrylic plate Wedding Season 01
  4. Stamping Polish: Essence Stampy White
  5. Rainbow: Sharpie Permanent Markers
  6. Top coat:  Essence Quick Dry


Thanks for watching!!! ♥