Sunday 29 November 2015

Christmas Flower Manicure with UberChic Christmas-01 Plate


Hi Everyone, today I will show you a Christmas manicure made with UberChic Beauty Christmas-01
Stamping Plate!
Some days ago I reviewed this beautiful plate and for today's mani I chose the flower Christmas design. 
I waited for this amazing image for much time!!!
Now, let's go with all instructions!!!
First of all I applied two layers of white polish (Wet n Wild French White Crème)
Later, I prepared  some stamping decals with UberChic Beauty Christmas-01 and Essence Stampy Black...
After that, I painted the decals with Kiko 296, Kiko 238 and Kiko 283.
I left to dry the decals for some minutes,  I removed them and I applied on my nails.
I completed this manicure with some golden glitter to give more light to the Christmas  flower!
Finally, I protected the nail art with Top Coat. 
You can find this plate HERE.
Don't miss the video tutorial below!


Ciao a tutti, oggi  vi  mostrerò  una  manicure di  Natale  fatta  con la  piastra di  UberChic Beauty  
Christmas-01!!!
Qualche giorno fa ho recensito questa bellissima piastra e per la manicure di mio oggi ho scelto il disegno della stella di Natale. Ho aspettato per questa immagine stupefacente per molto tempo!!!
Ora, andiamo con tutte le istruzioni !!!
Prima di tutto ho applicato due strati di smalto bianco (Wet n Wild French White Crème).
Poi ho preparato alcuni stamping decals con UberChic Beauty Christmas-01 ed Essence Stampy nero ...
Dopo di che, ho dipinto i decals con Kiko 296, Kiko 238 e Kiko 283.
Ho lasciato asciugare i decals per alcuni minuti, li ho staccati e li ho applicati sulle unghie.
Ho completato questa manicure con un po'di brillantini dorati per dare più luce alla stella di Natale!
Infine, ho protetto la nail art con Top Coat.
È possibile trovare questa piastra QUI.
Non perdetevi il video tutorial qui sotto!


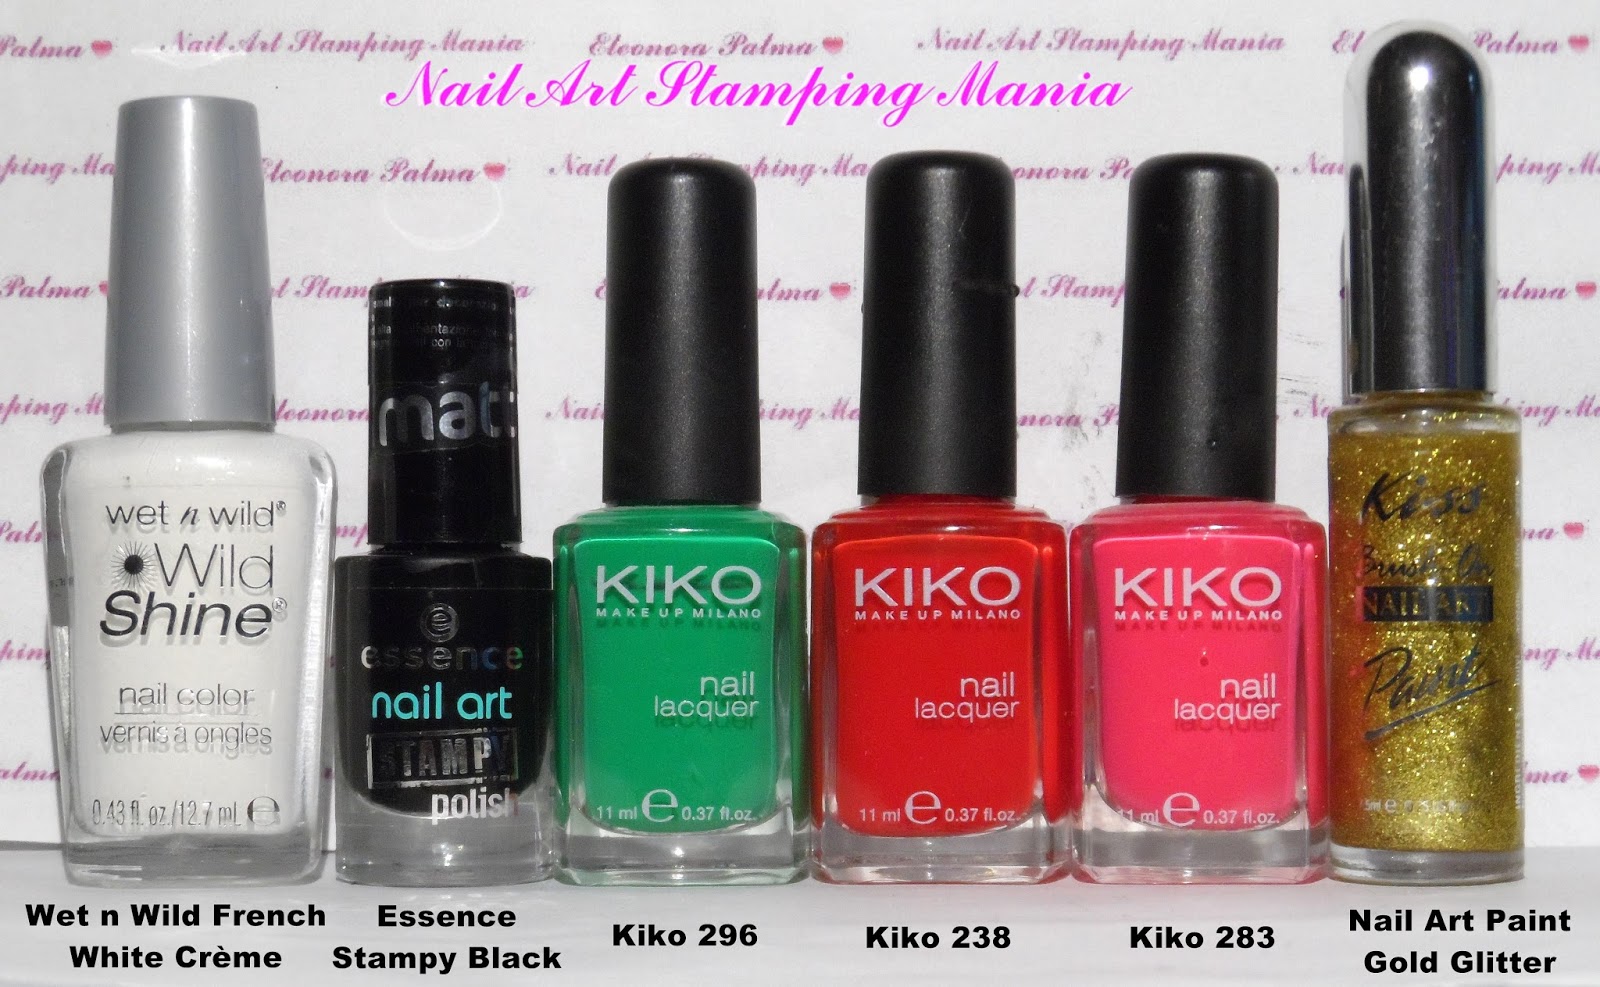
Wet n Wild French White Crème, Essence Stampy Black, Kiko 296, Kiko 238, Kiko 283 and
Nail Art Paint Gold Glitter.


UberChic Beauty Christmas-01


Video Tutorial:


What I used:

Cosa ho Usato:

  1. Base: Layla Rocky Nail
  2. Base Polish: Wet n Wild French White Crème
  3. Stamping Plate: UberChic Beauty Christmas-01
  4. Stamping Polish: Essence Stampy Black
  5. Stamping Decal Polishes: Kiko 296, Kiko 238 and Kiko 283
  6. Nail Art Decoration: Nail Art Paint Gold Glitter.
  7. Top coat:  Essence Quick Dry 

Thursday 26 November 2015

Glitter Thermal Nail Polish Fuchsia-Light Pink from Born Pretty - Swatches and Review


Hi, girls! Today I will show you a color changing thermal nail polish from  Born Pretty Store!
It's a glitter polish that changes color from Light Rose (with warm temperature) to Fuchsia (with cold).
The bottle contains 7.5 ml of polish.
I applied three coats of Born Pretty Temperature Color Changing Nail Polish #6....but don't worry...it dries very fast!
The change is very evident...it's always a magic!!!
I advise you to keep this type of nail polishes away from light and temperature changes.
This  polish is available HERE and you can get 10% of discount using the following code: ABYW10
Don't miss the video tutorial below!


Ciao ragazze! Oggi vi mostrerò uno smalto che cambia colore in base alla temperatura di Born Pretty Store!
Si tratta di uno smalto glitterato che cambia colore Rosa chiaro (con temperatura calda) a Fucsia (col freddo).
La boccetta contiene 7.5 ml di smalto.
Ho applicato tre mani di Born Pretty Temperature Color Changing Nail Polish #6.... ma non preoccupatevi ... asciuga molto velocemente!
Il cambiamento è molto evidente ... è sempre una magia !!!
Vi consiglio di tenere questo tipo di smalti lontano dalla luce e da sbalzi di temperatura.
Questo smalto è disponibile QUI e si può ottenere il 10% di sconto utilizzando il seguente codice: ABYW10
Non perdetevi il video tutorial qui sotto!


Here you can see how changes the color from cold to warm!!!
------
Qui potete notare come cambia il colore dal freddo al caldo!!!


Temperature Color Changing Nail Polish #6
7.5 ml


Light Rose (with warm temperature) 
Rosa Chiaro (con temperatura calda)


  Fuchsia (with cold temperature)
Fucsia (con temperatura fredda)


Here I stamped with Born Pretty Stamping Polish 08
--------
Qui ho stampato con lo smalto per stamping Born Pretty 08


Video Tutorial:


What I used:

Cosa ho Usato:

  1. Base: Layla Rocky Nail
  2. Base Polish: Temperature Color Changing Nail Polish #6 from Born Pretty
  3. Stamping Polish: Born Pretty 08
  4. Top coat:  Essence Quick Dry 


Thanks for watching!

Tuesday 24 November 2015

UberChic Beauty Collection 6 - Swatches And Review


Hi stampaholics!
It's almost one year that UberChic Beauty company has created their first Collection of stamping plates...now they have grown and their brand it's known for the high quality and the innovative and original designs of their plates!
They are, moreover, the first that made the Uber Mat that is very useful to create stamping decals, decals with nail polishes and so on...This is the result of people that love very much their work and that are first and foremost fans stamping plates just like us!
Now their items are sold also even on Amazon! Also, there is a Facebook FanPage where it's possible to share all of our UberChic manis! 
I'm so proud of them and it's an honor and a pleasure to review their amazing plates!!!
Last week I published the review about the Christmas-01 plate and today it's the turn of their sixth collection!!! 
I'm crazy for these plates and I can not resist to them! Each Set is awesome and this is no exception! 
As with UberChic's other plates the plates measure 9.5 cm x 14.5 cm each and most of full nail images measure 17 x 21 mm.
The back of each plate is plasticized so the edges aren't sharp! 
I tested some designs with Essence Stampy black....the quality is excellent as always!!!!
UberChic Beauty Collection 6 can be purchased HEREThe price is $24.99 for each set + shipping cost. 

Now, I let you enjoy with all images and with my video tutorial in which I tested some patterns!!! ( You can see also the reviews about the Collection 1Collection 2Collection 3Collection 4 and Collection 5).


Ciao amanti dello stamping!
E 'quasi un anno, che la società  UberChic Beauty ha creato la sua prima collezione di piastre per stamping  ... ora sono cresciuti e il loro marchio è noto per l'alta qualità e il design innovativo e originale dei loro piatti! Sono stati, oltretutto, anche i primi che hanno fatto il tappetino Uber Mat che è molto utile per creare stamping decals, decals con smalti e così via ... Questo è il risultato di persone che amano molto il loro lavoro e che sono prima di tutto dei fan di piastre per  stamping proprio come noi!
Ora i loro articoli sono venduti anche anche su Amazon! Inoltre, vi è una Facebook FanPage dove è possibile condividere le nostre manicure UberChic!
Sono molto orgogliosa di loro ed è un onore e un piacere recensire i loro piatti incredibili !!!
La scorsa settimana ho pubblicato la recensione sulla piastra di Natale Christmas-01 e oggi è il turno della loro sesta collezione!!!
Sono pazza per questi piatti e non riesco a resistergli! Ogni set è impressionante e questo non fa eccezione!
Come per le altre piastre UberChic anche queste piastre misurano 9,5 cm x 14,5 cm ciascuna e la maggior parte delle immagini a grandezza intera misurano 17 x 21 mm.
Il retro di ogni piatto è plastificato modo che i bordi non sono taglienti!
Ho provato alcuni disegni con Essence Stampy nero .... La qualità è eccellente come sempre!!!!
UberChic Beauty Collection 6 può essere acquistata QUI. Il prezzo è di 24,99 $ per ogni set ( 23.4€)  + spese di spedizione.

Ora, vi lascio con le immagini e con il mio video tutorial in cui ho testato alcuni modelli!!! (Potete vedere anche le recensioni sulla Collection 1Collection 2, Collection 3Collection 4 e sulla Collection 5)


The back of these plates is protected, so, the edges  aren't sharp!!! 
---------
La parte posteriore di queste piastre è protetta, quindi, i margini non sono taglienti !!!


Remember to remove the blue film
--------
Non dimenticate di rimuovere la pellicola blu!!!!


Each plate measures 14.6 cm x 9.5 cm
-------
Ogni piastra misura 14.6 cm x 9.5 cm


Almost all the images measure 2.1 cm x 1.7 cm
---------
Quasi tutte le immagini misurano 2.1 cm x 17 cm


UberChic Beauty 6-01


UberChic Beauty 6-02


UberChic Beauty 6-03


   I tested some designs with Essence Stampy Black
-----
Ho testato alcune immagini con Essence Stampy nero


Video tutorial
 UberChic Beauty Collection 6:


UberChic Beauty Collection 1:


UberChic Beauty Collection 2:


UberChic Beauty Collection 3:


UberChic Beauty Collection 4:


 UberChic Beauty Collection 5:


Thanks for watching!

Friday 20 November 2015

Born Pretty Nail Art Stamping Polishes - Swatches and Review


Hi everyone! In this post I will show you two of the new Stamping Polishes from Born Pretty Store!!!
These special polishes for stamping are available in 19 colors and each bottle contains 15 ml of product. I chose the Light Blue 09 and the violet 08.
They work very well and are perfect also over black!!! Below you will find a video tutorial to show you how they stamp.
These polishes are available HERE and you can use the following code to get 10% of discount: ABYW10


Ciao a tutti! In questo post vi mostrerò due dei nuovi smalti per stamping di Born Pretty Store !!!
Questi smalti speciali per stamping sono disponibili in 19 colori e ogni bottiglia contiene 15 ml di prodotto. Ho scelto il celeste 09 e il 08 viola.
Funzionano molto bene e sono perfetti anche su nero !!! Qui di seguito troverete un video tutorial per mostrarvi come timbrano.
Questi smalti sono disponibili QUI ed è possibile utilizzare il seguente codice per ottenere il 10% di sconto: ABYW10


Born Pretty 09 and 08


Video Tutorial:


Thank you for reading!


Tuesday 17 November 2015

UberChic Beauty Christmas-01 Nail Stamping Plate Review


Hi Everyone! It takes almost a month to Christmas and it's time to get some new tools for our Christmas manicures themed!
So, today, I will show you UberChic Beauty‘s Christmas-01 plate!
 The size of this plate is 9.5 cm by 14.5 cm and it contains  full images (17 x 21 mm) as well as smaller images.
You can find snowflakes, Christmas trees, snowmen, hut of Jesus, a beautiful Christmas flower....all in perfect Christmas style!
This plate comes with a blue protective film (don't forget to remove it  before stamping) and the back is paper to eliminate sharp edges on the plate.
UberChic Beauty Christmas-01 plate is available HERE and the price is $14.99 + shipping cost.
You can find the video review at  the end of the post!!!


Ciao a tutti! Manca ormai quasi un mese a Natale ed è tempo di fornirsi di nuovi strumenti per le nostre manicure a tema natalizio!
Così, oggi,  vi mostrerò la piastra UberChic Beauty Christmas-01!
La dimensione di questa piastra è di  9,5 centimetri per 14,5 centimetri e contiene immagini grandi  (17 x 21mm) e anche immagini più piccole.
È possibile trovare fiocchi di neve, alberi di Natale, pupazzi di neve, capanne di Gesù, una bella stella di Natale .... il tutto in perfetto stile natalizio!
Questa piastra è  fornita di una pellicola protettiva blu  (non dimenticate di rimuoverla prima di stampare) e la parte posteriore è di carta per eliminare gli spigoli taglienti sulla piastra.
UberChic Beauty Christmas-01 è disponibile QUI e il prezzo è di $ 14,99 + spese di spedizione.
È possibile trovare il video con  recensione alla fine del post !!!


This plate measures 14.6 cm x 9.5 cm
-----------
Questa piastra misura 14.6 cm x 9.5 cm


Almost all the images measure 2.1 cm x 1.7 cm
--------
Quasi tutte le immagini misurano 2.1 cm x 1.7 cm


UberChic Beauty Christmas-01


I tested some designs with Essence Stampy Black
-----------
Ho testato alcune immagini con Essence Stampy nero


Video Tutorial:


Thanks for watching!!! ♥

Saturday 14 November 2015

Holographic Butterfly With Marianne XXL-4 Plate


Hi girls! Today I will show you the Stamping Decal Technique with Nail Foil!
I started with two coats of white polish and later I made a gradient manicure...
You need a nail foil that has two faces...so that you can use also the B side! This means that also on the back of the foil you can see the holographic effect!!!
If the foil hasn't a "B" side it doesn't work for this manicure!  In this case you can make a different technique that I showed in a previous post...but it's a bit 'more complicated!
I applied one layer of top coat on UberChic mat and I stamped with Marianne Nails  XXL-4 and Essence Stampy Black...I used the mat but you can also stamp the image and add a layer of top coat over the
stamper!!!
Over the image I added the special glue for Nail Foil and I let dry for about 8/10 minutes...
After that, I pressed a piece of foil over the image...I removed the butterfly and I applied it on my nail.
I prepared three butterfly decals for middle finger, ring finger and thumb, while, for index and pinkie a chose a flower pattern from the same plate.
Finally, I added one layer of top coat!
You can order the XXL-4 plate HERE and UberChic Mat HERE
For more details you can see the video tutorial at the end of the post!!!


Ciao ragazze! Oggi vi mostrerò la tecnica dello Stamping Decal con nail Foil!
Ho iniziato con due mani di smalto bianco e poi ho fatto una manicure sfumata...
Avete bisogno di un nail foil che abbia due facce ... in modo che sia possibile utilizzare anche il lato B! Questo significa che anche sul retro del foil si può vedere l'effetto olografico !!!
Se il foil non ha un lato "B" non va bene per questa manicure! In questo caso è possibile effettuare una tecnica diversa che ho mostrato in un precedente post...ma è un po 'più complicato!
Ho applicato uno strato di top coat su UberChic mat e ho timbrato con Marianne Nails  XXL-4 ed Essence Stampy nero ... Io ho usato il tappeto, ma potete anche stampare l'immagine e aggiungere uno strato di top coat sullo Stamper !!!
Sull'immagine ho aggiunto la colla speciale per Nail Foil e ho lasciato asciugare per circa 8/10 minuti ...
Dopo di che, ho premuto un pezzo di foil sopra l'immagine ... ho staccato la farfalla e l'ho applicata sull'unghie.
Ho preparato tre decals farfalla per il dito medio, anulare e pollice, mentre, per l'indice e il mignolo un scelto un motivo floreale dalla stessa piastra.
Infine, ho aggiunto uno strato di top coat!
È possibile ordinare la piastra XXL-4 QUI e UberChic Mat QUI
Per maggiori dettagli è possibile vedere il video tutorial alla fine del post !!!


Wet n Wild French White Crème, Kiko 338, Essence Stampy Black
and Nail Art Foil


Special Glue For Nail Foil


Marianne Nails XXL-4 


Video Tutorial:


What I used:

Cosa ho Usato:


  1. Base: Layla Rocky Nail
  2. Base Polish: Wet n Wild French White Crème
  3. Gradient Polish: Kiko 338
  4. Stamping Plate: Marianne Nails XXL-4 
  5. Stamping Polish: Essence Stampy Black
  6. Stamping Decal: Nail Art Foil + Special Glue For Nail Foil
  7. Top coat:  Essence Quick Dry