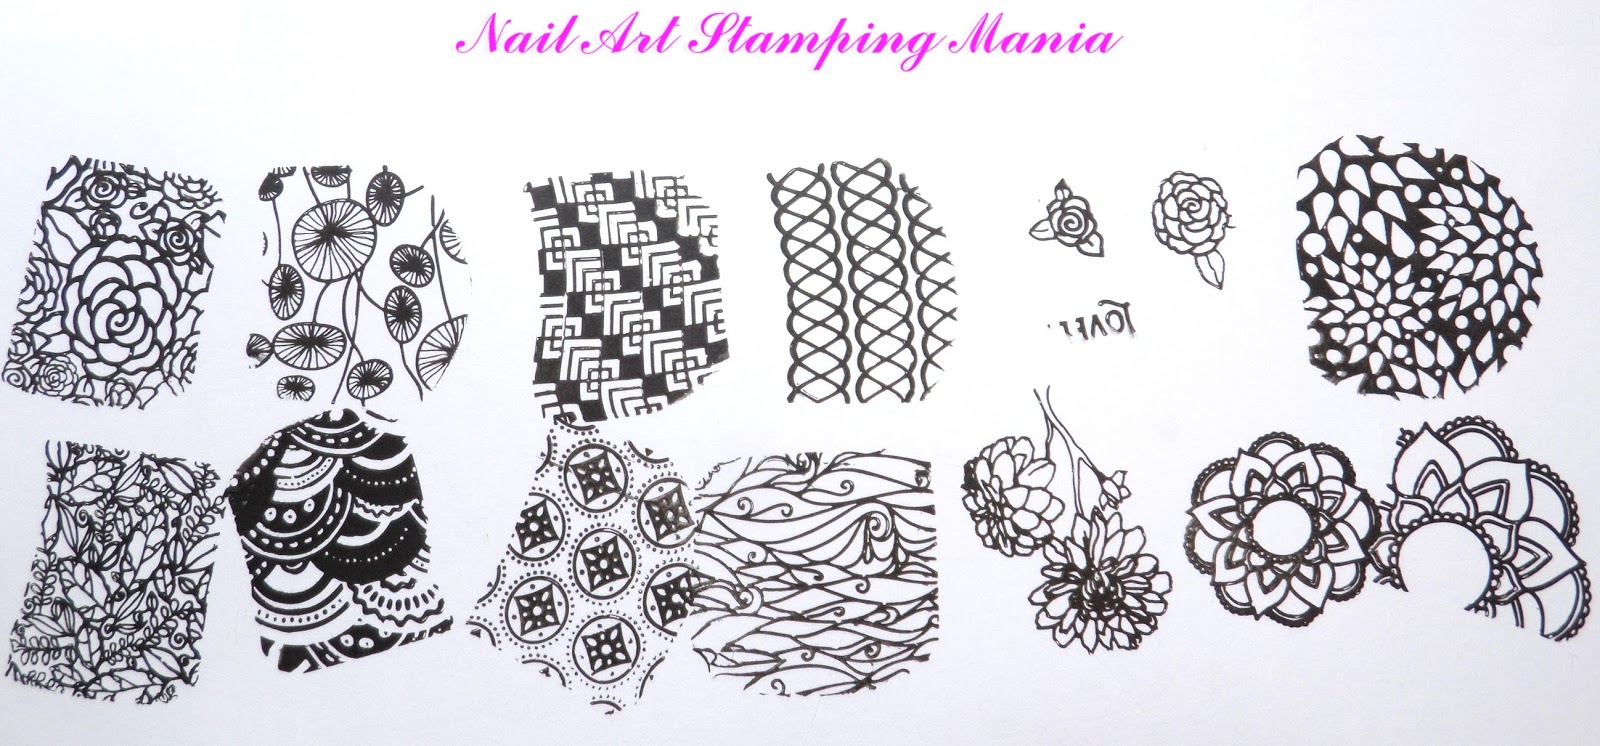
I'm so thrilled 'cause this plate is one of my favorites ÜC plates of all times!
I'm an holosexuals and this plate is full of optical illusion images...perfect to use with holo nail polishes!!!
You can find also many catch phrases about holo down the center of the plate!
As with UberChic Beauty's other stamping plates, Op Art Magic measures 9.5 x 14.5 cm with the full nail images measuring 17 x 21 mm and the designs are engraved very well!
I had to of course do a mani right away and include holo!
This plate is available HERE and the price is $14.99 + shipping cost.
Don't miss the video review at the end of the post!!!

Ehilà! Per il post di oggi desidero recensire una delle piastre a tema di UberChic Beauty: Op Art Magic.
Sono così entusiasta perchè questa piastra ÜC è una delle mie preferitete di tutti i tempi!
Io sono holosexuals e questa piastra è piena di immagini di illusioni ottiche...perfette da usare con smalti olografici!!!
Si possono trovare anche molti frasi sugli olografici lungo il centro della piastra!
Come per le altre piastre di UberChic Beauty, Op Art Magic misura 9,5 x 14,5 cm e le immagini a unghia piena misurano 17 x 21 mm e i disegni sono incisi molto bene!
Ho dovuto ovviamente fare un mani subito e includono ologramma!
Questa piastra è disponibile QUI e il prezzo è di $ 14,99 + spese di spedizione.
Non perdete il video con la recensione alla fine del post !!!


What I used:
Cosa ho Usato:

The back of this plate is protected with paper!
---------
La parte posteriore di questa piastra è protetta con carta!
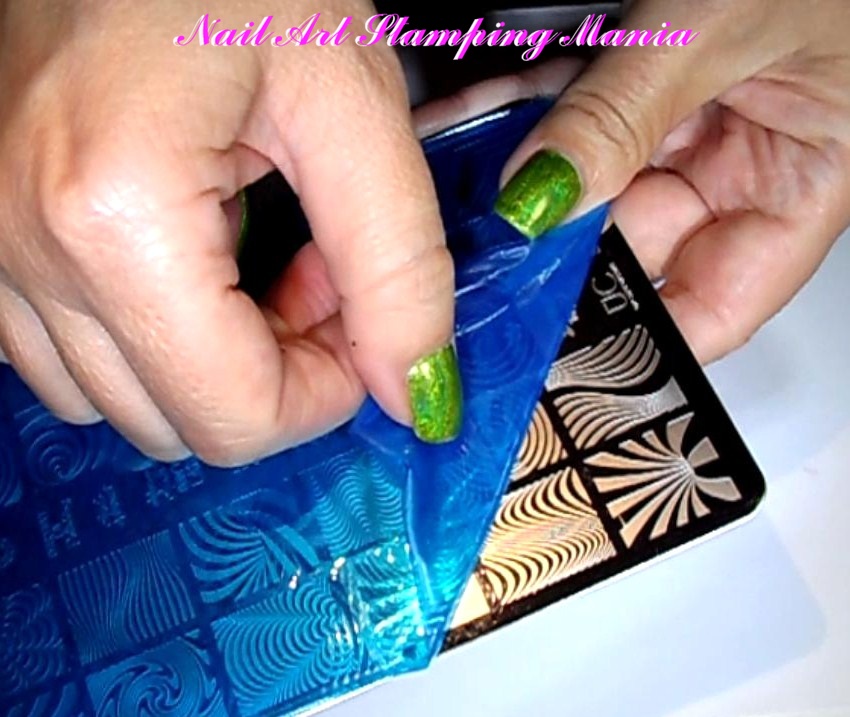
Don't forget to remove the blue film!!!
--------
Non dimenticate di rimuovere la pellicola blu!!!!

UberChic Beauty Op Art Magic

I tested some designs with Essence Stampy Black
---------
Ho testato alcune immagini con Essence Stampy nero

For this manicure I applied two coats of white polish to give more "light" to holo polishes. Later
I applied one layer of Shaka "Hologram" polishes...Silver, Rose, Sky, Green and Violet (on thumb).
I applied one layer of Shaka "Hologram" polishes...Silver, Rose, Sky, Green and Violet (on thumb).
Finally I stamped with a pattern of this plate and Essence Stampy Black.
------
Per questa manicure ho applicato due mani di smalto bianco per dare maggior "luce" agli
smalti olografici. Poi ho applicato una mano di smalti Shaka "Hologram"...Silver, Rose,
Sky, Green e Violet (sul pollice). Infine ho timbrato con un modello di questa piastra
ed Essence Stampy nero.

Video Tutorial:
What I used:Cosa ho Usato:- Base: Layla Rocky Nail
- Base Polish: Wet n Wild French White Crème
- Holo Polishes: Shaka "Hologram" Silver, Rose, Sky, Green and Violet.
- Stamping Plate: UberChic Beauty Op Art Magic
- Stamping Polish: Essence Stampy Black.
- Top coat: Essence Quick Dry
Thanks for reading!!! ♥
Grazie per la lettura!!! ♥