Showing posts with label Studs. Show all posts

Sunday, 8 January 2017

Marble Manicure with Alcohol Inks and Cici&Sisi plate - Tutorial


Hi  Everyone! In this post I'll show you a manicure with marble effect done with alcohol inks!
I applied two layers of white polish and I let it dry.
I put some little drops of alcohol inks "Colorink Magenta" and "Colorink Purple" (I previously mixed the alcohol inks with isopropyl alcohol in an empty bottles). In the video tutorial below you will see how I created the marble effect.
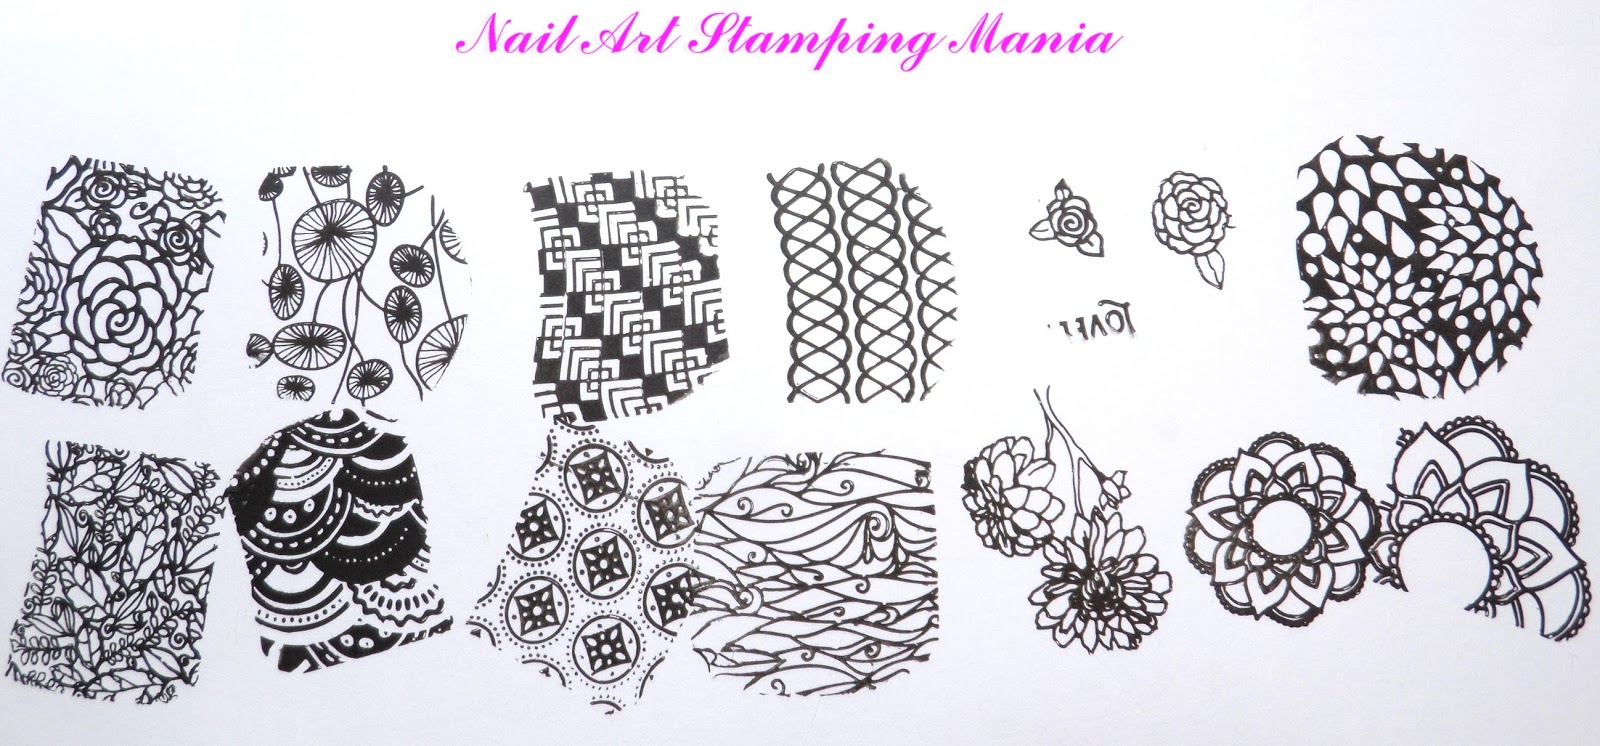
Later, I stamped with the Cici&Sisi acrylic stamping plate Indian Style 01 and MdU 16 Lilac. On my middle finger I applied a silvery stud.
You can find this plate HEREThe MdU stamping polishe is sold HERE and the Alcohol Inks HERE.


Ciao a tutti! In questo post vi mostrerò una manicure con effetto marmo fatta con inchiostri ad alcool!
Ho applicato due mani di smalto bianco e ho lasciato asciugare.
Ho messo alcune piccole gocce di inchiostri ad alcool  "Colorink Magenta" e "Colorink Purple" (ho precedentemente mescolato gli inchiostri ad alcool con alcol isopropilico in boccette vuote). Nel video tutorial qui sotto si vedrà come ho creato l'effetto marmo.
Successivamente, ho timbrato con la piastra acrilica Cici&Sisi Indian Style 01 e MDU 16 lilla. Sul  medio ho applicato una borchia argentata.
Potete trovare questa piastra QUI. Lo smalto per stamping di MdU è in vendita QUI e gli Inchiostri ad alcool QUI.


Cici&Sisi - Indian Style 01


The pattern that I chosen


Video Tutorial:


What I used:

Cosa ho Usato:

  1. Base: Layla Rocky Nail
  2. Base Polishes: Wet n Wild White Crème 
  3. Marble Effect: Alcohol Ink "Colorink" Magenta + Isopropyl Alcohol and Alcohol Ink "Colorink" Purple + Isopropyl Alcohol
  4. Stamping Plate:  Cici&Sisi - Indian Style 01
  5. Stamping Polish: MdU 16 Lilac
  6. Nail Art Decorations: Silver stud.
  7. Top coat:  Essence Quick Dry


Thanks for reading!!! ♥

Grazie per la lettura!!! ♥

Thursday, 18 August 2016

UberChic Beauty Collection 11 - Swatches And Review


Hello Ladies!Today I have the eleventh collection from UberChic Beauty to share with you!
This set contains three plates that measure 9.5 x 14.6 cm each.
In these plates there are a lot of mandala images, geometric image, flowers, small individual roses, swirls, negative spaced images and so on!
There are full nail images that measure 2.1 cm x 1.7 cm, large multi-nail images and smaller individual images.  Each plate comes with a protective backing as well as a blue film that must be removed before use. The quality is excellent as always!
The UberChic Beauty Collection 11 nail stamping plates can be purchased HERE .
The price is $24.99 for the entire set + shipping cost.
Remember that you can find UberChic Beauty also here:
Instagram
Facebook
Facebook Groups
Pinterest
Now, I let you with all images and with the video tutorial!!!


Ciao signore! Oggi ho l'undicesima Collezione di UberChic Beauty da condividere con voi!
Questo set contiene tre piastre che misurano 9,5 x 14.6 cm ciascuno.
In queste piastre ci sono un sacco di immagini mandala, immagini geometriche, fiori, piccole rose singole, turbinii, immagini "negative space" e così via!
Ci sono immagini a grandezza intera che misurano 2,1 cm x 1,7 cm, grandi immagini multi-unghie e piccole immagini singole. Ciascuna piastra è dotata di una protezione sul retro, nonché una pellicola blu che va rimossa prima dell'uso. La qualità è eccellente come sempre! 
La Collezione 11 di UberChic Beauty può essere acquistata QUI.
IIl prezzo è di $ 24,99 per l'intero set + spese di spedizione.
Ricorda che puoi trovare UberChic Beauty anche qui:

Ora, vi lascio con tutte le immagini e con il video tutorial !!!


The back of these plates is protected with paper and the blue film must be removed before use!!!
---------
La parte posteriore di queste piastre è protetta con carta e la pellicola blu deve essere rimossa 
prima dell'uso !!!


Each plate measures 14.6 cm x 9.5 cm and almost all the images 
measure 2.1 cm x 1.7 cm
-------
Ogni piastra misura 14.6 cm x 9.5 cm e quasi tutte le immagini 
 misurano 2.1 cm x 17 cm


UberChic Beauty 11-01


UberChic Beauty 11-02


UberChic Beauty 11-03


I tested some designs with Essence Stampy Black
---------
Ho testato alcune immagini con Essence Stampy nero


For this Stamping Decal  manicure I applied two coats of F.U.N Lacquer Mowed Meadow
I made a stamping decalwith UberChic Beauty 11-01 and MdU 65 Lime. Later, I filled 
the decal with Kiko 491. Finally I added a stud on ring finger.
------
 Per questa manicure Stamping Decal ho applicato due mani di F.U.N Lacquer Mowed Meadow
Ho fatto un decal con UberChic Beauty 11-01 e MdU 65 Lime. Poi, ho riempito
il decal con Kiko 491. Infine ho aggiunto una borchietta sull'anulare.


Video Tutorial:


What I used:

Cosa ho Usato:


  1. Base: Layla Rocky Nail
  2. Base Polish: F.U.N Lacquer Mowed Meadow
  3. Stamping Plate: UberChic Beauty 11-01
  4. Stamping Polish: MdU 65 Lime.
  5. Stamping Decal Polish: Kiko 491.
  6. Nail Art Decorations: Some golden studs.
  7. Top coat:  Essence Quick Dry


Thanks for reading!!! ♥


Grazie per la lettura!!! ♥


Saturday, 11 June 2016

UberChic Beauty Uber Mini Nail Stamp Plates - Part Two - Review


Hey there! About two months ago I reviewed the first four Uber Mini plates launched from UberChic Beauty!
Today I have other two new mini plates to show you: The Fabulous Feathers and the Nautical plate!
Who doesn't love feathers? I really love feathers of all sorts! If you too love the feathers and peacock feathers you can't miss "Fabulous Feathers" plate!
The "Nautical" plate is perfect for the summer with anchors, rudders, corals, a cute submarine, octopus, sharks and shells!
These plates measure 12 cm x 6 cm! Each plate have full nail patterns that measure 2.1 cm x 1.7 cm and single images.
They are sold HERE and the price is $7.99 for each plate + shipping cost.
I let you  with all images and with the video tutorial at the end of the post!!!


Ehilà! Circa due mesi fa ho recensito le prime quattro piastre Uber Mini  lanciate da UberChic Beauty! 
Oggi ho altre due nuove mini piastre da mostrarvi: la piastra Fabulous Feathers e la Nautical!
Chi non ama le piume? Mi piacciono  molto le piume di tutti i tipi! Se anche voi amate piume e piume di pavone non potete perdere la piastra "Fabulous Feathers"!
La piastra "Nautical" è perfetta per l'estate con ancore, timoni, coralli, un simpatico sottomarino, polpi, squali e conchiglie!
Queste piastre misurano 12 cm x 6 cm! Ogni piastra ha immagini a unghia piena che misurano 2.1 cm x 1.7 cm e immagini singole.
Esse sono vendute QUIe il prezzo è di $ 7.99 per ognuna  + spese di spedizione.
Vi lascio con le immagini e con il video tutorial alla fine del post!!!


Each plate have a thicker plastic backing on them!!!

---------
Ogni piastra ha un supporto spesso in plastica sul retro!!!


Don't forget to remove the blue film!!!
--------
Non dimenticate di rimuovere la pellicola blu!!!!


Each plate measures 12 cm x 6 cm
-------
Ogni piastra misura 12 cm x 6 cm


The full nail patterns measure 2.1 cm x 1.7 cm
---------
Le immagini a unghia piena misurano 2.1 cm x 17 cm


UberChic Beauty Uber Mini Fabulous Feathers


UberChic Beauty Uber Mini Nautical


I tested some designs with Essence Stampy Black
-----
Ho testato alcune immagini con Essence Stampy nero


Here I made two manicure with these plates!


Qui di seguito ho fatto due manicure con queste piastre!


I used UberChic Beauty Uber Mini Fabulous Feathers
 for this Stamping Decal manicure...
 I used  Wet n Wild French White Crème  as a base (and Kiko 530 on index finger and pinkie)
I stamped with Uber Mini Fabulous Feathers and Mundo de Unas 3 Blue Navy.
Later I painted the decals with Deborah Shine Tech 71 and Colour Alike Supernova.
------
 Per questa Stamping Decal manicure ho usato Uber Mini Fabulous Feathers...
Ho usato Wet n Wild French White Crème come base (e Kiko 530 su indice e mignolo).
Ho stampato con Uber Mini Fabulous Feathers e Mundo de Unas 3 Blue Navy.
Poi ho dipinto i decals con Deborah Shine Tech 71 e Colour Alike Supernova.


For this manicure I applied two layers of Essence 63 Itsy Bitsy Blue Bikini. 
Later, I stamped with UberChic Beauty Uber Mini Nautical and
Colour Alike Mars. Finally I added some Golden Shells.
---------
Per questa manicure ho applicato due mani di Essence 63 Itsy Bitsy Blue Bikini.
Poi ho timbrato con UberChic Beauty Uber Mini Nautical e
Colour Alike Mars. Infine ho aggiunto alcune conchiglie dorate.


Video Tutorial:


Thanks for watching!!! ♥


Wednesday, 23 December 2015

Snowflakes Manicure with Christmas Nail Art Decoration and QA Plate


Hi Everyone, today I will show you a winter manicure made with gradient and with some Metal Snowflake Nail Art Decorations from Born Pretty Store.
It's a wheel that contains 9 different patterns Christmas themed for a total of 120  3D golden decorations!
I started with a silver base (Kiko Mirror 616) and I applied liquid latex round my nails, so,  I made a gradient manicure with Kiko 328, Kiko 386 and Kiko 265.
Later I stamped with Born Pretty QA86 and Essence Stampy White...
For pinkie and index finger I applied a metal snowflake chose between the patterns in the wheel and that I previously painted with a white polish...
When the snowflake has dried, I applied on the finger with a drop of top coat.
This wheel is available HERE and the plate HERE  and it's possible to can get 10% of discount using the following code: ABYW10
For more details I suggest you to see the video tutorial below!


Ciao a tutti, oggi vi mostrerò una manicure invernale con effetto gradient e con qualche decorazione in metallo a forma di  fiocco di neve di Born Pretty Store.
E 'una ruota che contiene 9 diversi modelli a tema Natale per un totale di 120 3D decorazioni dorate!
Ho iniziato con una base in argento (Kiko Mirror 616) e ho applicato il lattice liquido intorno alle unghie, quindi, ho fatto una manicure sfumata con Kiko 328, Kiko 386 e Kiko 265.
Successivamente ho timbrato con Born Pretty QA86 ed Essence Stampy bianco ...
Sull mignolo e l'indice ho applicato un fiocco di neve metallico scelto tra i modelli nella ruota e che ho precedentemente dipinto con uno smalto bianco ...
Quando il fiocco di neve è asciugato l'ho applicato sul dito con una goccia di top coat.
Questa ruota è disponibile QUI e la piastra QUI ed è possibile ottenere il 10% di sconto utilizzando il seguente codice: ABYW10
Per maggiori dettagli vi consiglio di vedere il video tutorial qui sotto


3D Metal Christmas Nail Art Decoration 


 There are 9 different patterns Christmas themed!


Kiko Mirror 616, Kiko 328, Kiko 386, Kiko 265, Essence Stampy White, Metal Christmas Nail Art Decoration and white polish (Wet n Wild French White Crème).


Born Pretty QA86 


Video Tutorial:


What I used:

Cosa ho Usato:

  1. Base: Layla Rocky Nail
  2. Base Polish: Kiko Mirror 616
  3. Gradient Polish: Kiko 328, Kiko 386 and Kiko 265
  4. Stamping Plate: Born Pretty QA86
  5. Stamping Polish: Essence Stampy White
  6. Nail Art Decoration: 3D Metal Christmas Nail Art Decoration from Born Pretty + white polish (Wet n Wild French White Crème)
  7. Top coat:  Essence Quick Dry 

Thanks for reading!!! ♥