Saturday 30 August 2014

AliExpress QSF VL-1 Plate Review


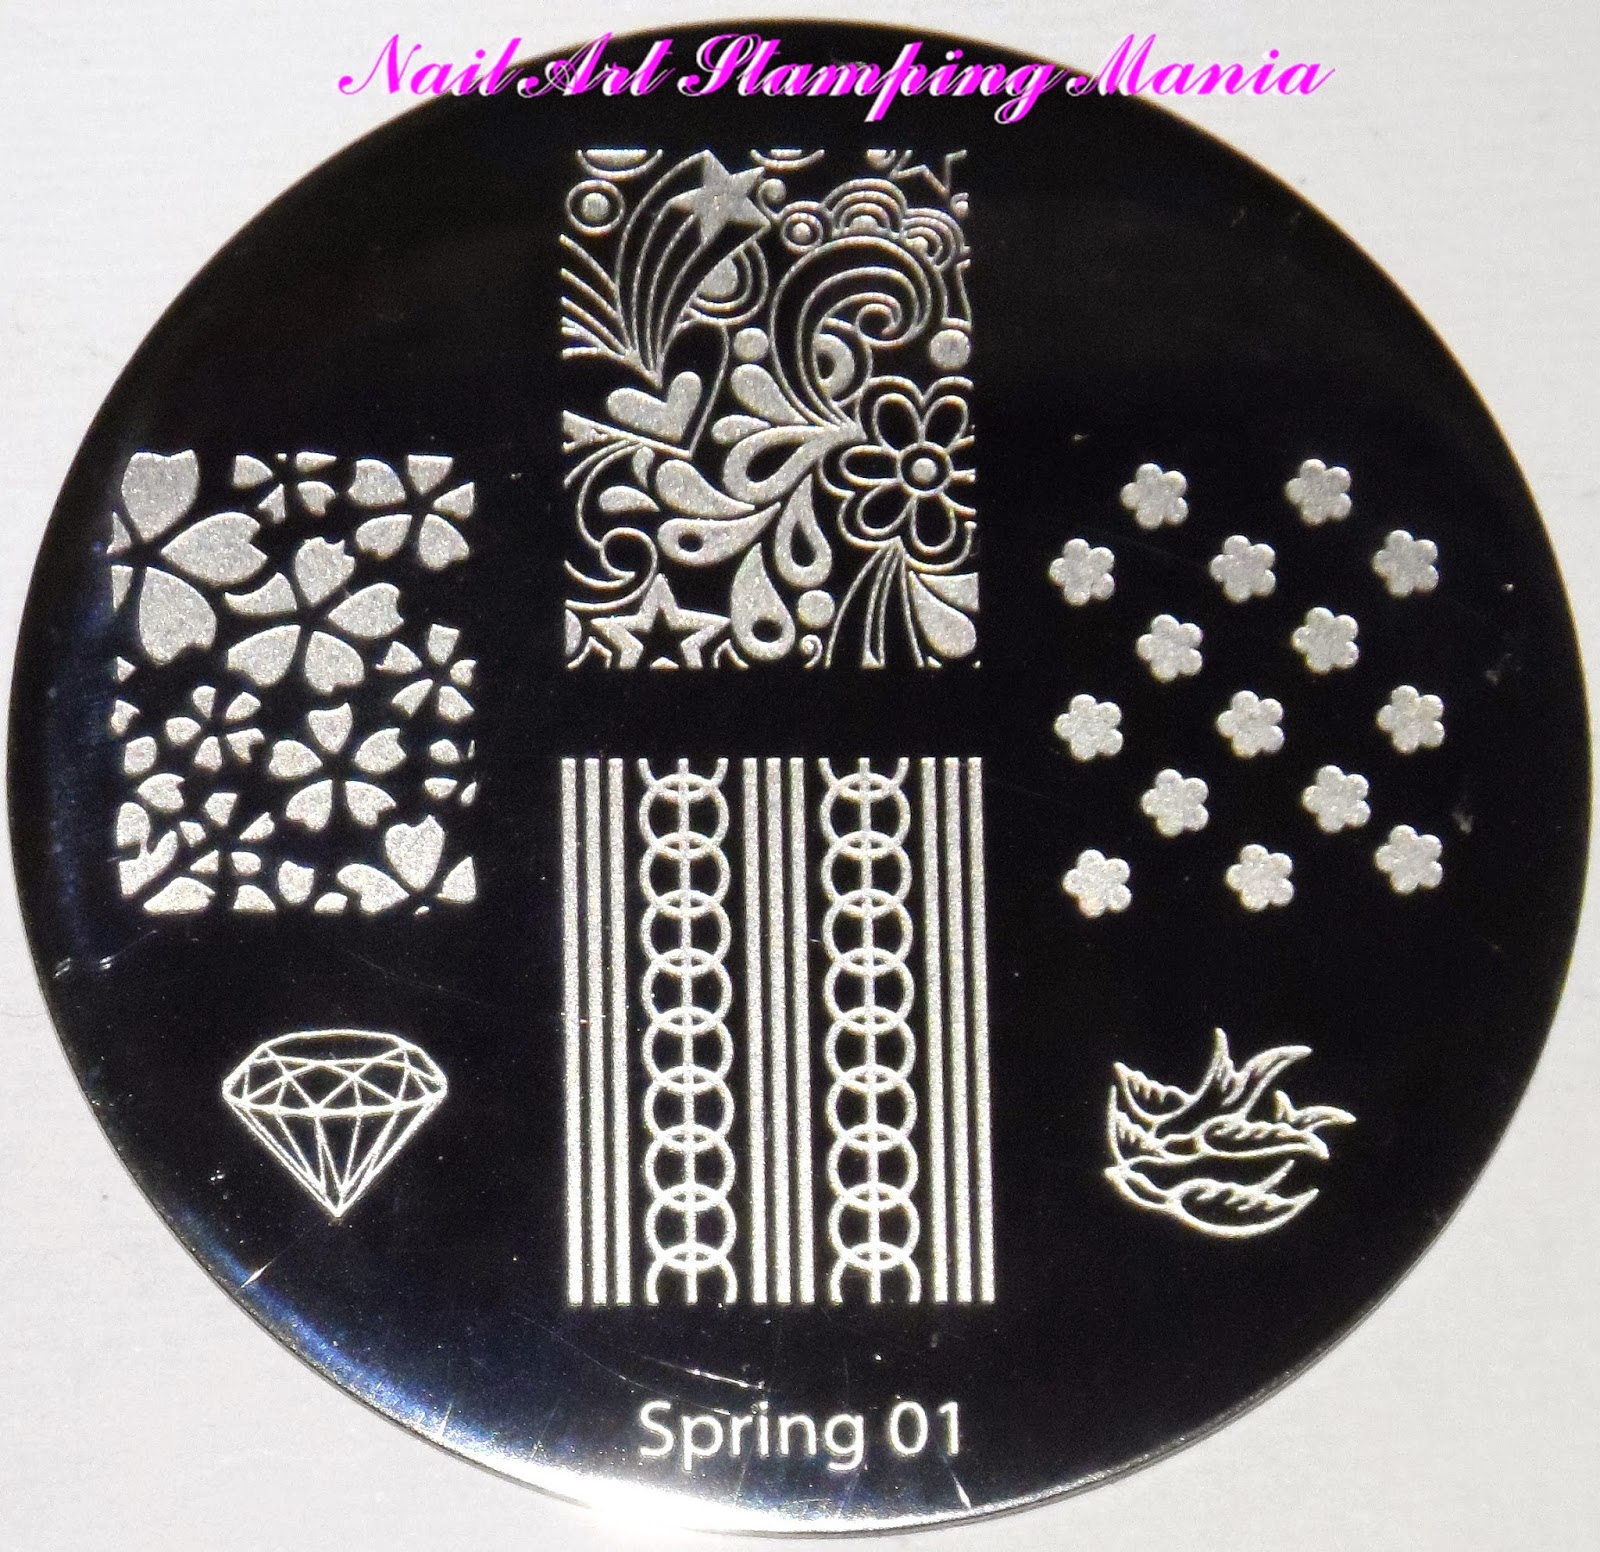
Hi girls! some days ago I received a stamping plate bought from AliExpress. It's an XL plate with big images called QSF VL-1. Almost all their images measure 20x14 mm each... and the images on the top are biggest!
I bought this plate here. They sell two of this plates at 16$ but I asked them if they could  send me only one and they  kindly agreed....so I paid only 8 $ shipping included (about 6 €) for this beautiful plate!!!!!


Ciao ragazze! Qualche giorno fa ho ricevuto una piastra acquistata da AliExpress. E 'un piatto  XL con grandi immagini chiamata QSF VL-1. Quasi tutte le immagini misurano 20x14mm ciascuno ... e le immagini sulla parte superiore sono più grandi! 
Ho comprato questo piatto qui. Vendono due di queste piastre a 16$ ma ho chiesto loro se potevano inviarmene  solo una e loro hanno gentilmente accettato .... così ho pagato solo 8 $ spedizione inclusa (circa 6 €) per questo bellissimo piatto!!!!!


AliExpress VL plate


The back of the plate


The edges  are sharp...So be carefull!!!
If you want save  your fingers from plates without protection on the back you can see my tutorial below...


I bordi sono taglienti ... Quindi, fate attenzione!!!!
Se desiderate  salvare le dita dalle piastre senza protezione sul retro è possibile vedere il mio tutorial qui sotto...


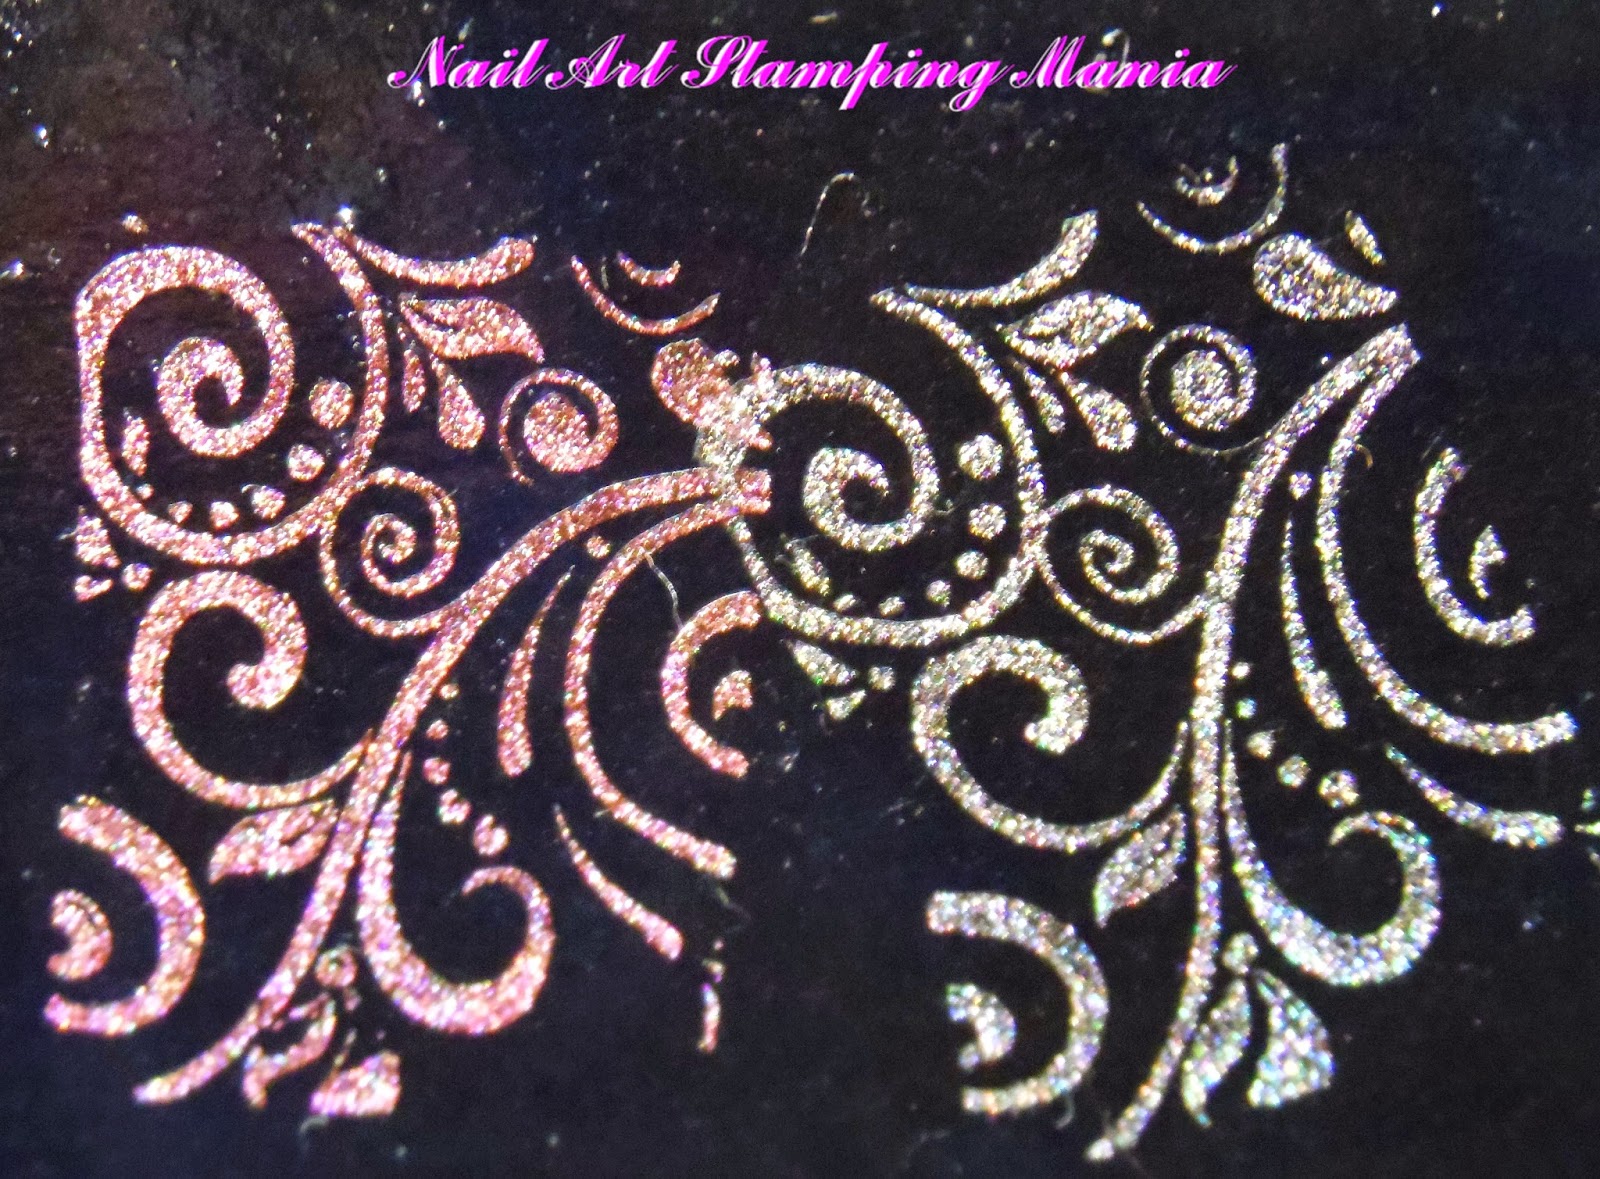
Here is my video tutorial with some images that I tested for you:

Ecco il mio tutorial video con alcune immagini che ho provato per voi:


Wednesday 27 August 2014

Color Club Halo Hues Beyond With Pueen Plate And 3D Decals


Hi lovelies!!! Today I'm sharing a mani I did with flowers decals from Born Pretty Store with you.  I used Color Club Halo Hues "Beyond" as my base on middle and ring finger, and the holo effect shine through the decals. On other fingers I used  Essence Nude Glam 01 Cotton Candy and a Pueen stamping plate (Pueen 27).
I'm in love with  these decals!!! I bought them here and I paid only 4.73$ (About 3.50€)  for 12 different patterns!!!!


Ciao care!!! Oggi  condivido con voi  una manicure che ho fatto con delle decalcomanie floreali di Born Pretty Store. Ho usato Color Club Halo Hues "Beyond" come base sul dito medio e l'anulare, e l'effetto olografico brilla  attraverso le decalcomanie. Sulle  altre dita ho usato Essence Nude Glam 01 Cotton Candy e una piastra Pueen (Pueen 27).
Mi sono innamorata di queste decalcomanie !!! Le ho comprate qui e ho pagato solo 4,73 $ (circa 3,50 €) per 12 modelli diversi!!!! 


Color Club Halo Hues "Beyond", Essence Nude Glam 01 Cotton Candy,
 Konad black and Born Pretty adhesives


Pueen 27


3D Nail Art Decals 


What I used:

Cosa ho Usato:

  1. Base: Essence Nude Glam 01 Cotton Candy and Color Club Halo Hues "Beyond"
  2. Stamping Plate: Pueen 27
  3. Stamping Special Polish: Konad black
  4. Adhesives: Born Pretty adhesives
  5. Top coat: Essence Quick Dry and then Essence Gel Look 


Sunday 24 August 2014

BeYu Holographic Polishes: Swatches And Review


Hi holo lovers!!!! Some weeks ago I find some holographic polishes in a Douglas perfume shop. They are from a German brand called BeYu.  There was five colors:  "Silver Illusion" 991, "Grey Illusion" 992,  "Berry Illusion" 993,  "Mauve Illusion" 994  and "Champagne Illusion" 995. I chosen only two of them, Grey and Berry Illusion. They are  scattered holos easy to apply and covering almost at the first coat. They don't need a special base and they last much...I removed them after 3 days (only because I  wanted to change polish!)  and I only had some minor tip wear and no chipping at all! The effect holo is not so evident (I prefer linear holos) and the colors aren't so original but I'm an holo fan and I couldn't resist not even to them!!!!!


Ciao a tutti!! Qualche settimana fa ho trovato alcuni smalti olografici in una profumeria Douglas. Si tratta di una marca tedesca chiamata BeYu. C'erano cinque colori:  "Silver Illusion" 991, "Grey Illusion" 992,  "Berry Illusion" 993,  "Mauve Illusion" 994  and "Champagne Illusion" 995. Ho scelto solo due di loro, Grey e Berry Illusion. Sono olografici scattered (con particelle holo "sparpagliate") facili da applicare e che coprono quasi alla prima mano. Non hanno bisogno di una base speciale e durano molto ... li ho tolti dopo 3 giorni (solo perché volevo cambiare smalto!) e ho avuto solo qualche segno di usura sulle punte e nessuna scheggiatura! L'effetto ologramma non è così evidente (io preferisco gli olografici  lineari) ed i colori non sono così originali, ma  sono una fan di Holos e non ho potuto resistere nemmeno a loro!!!!!


Grey Illusion 992 and Berry Illusion 993


Here are the swatches of Grey Illusion 992 and Berry Illusion 993. I gave two coats for each. No top coat.


Ecco gli swatches di Grey Illusion 992 e Berry Illusion 993. Ho dato due mani per ciascuno. Niente top coat. 


BeYu - Grey Illusion 992  


Berry Illusion 993
I think that this polish is a  bit more effected than the previous.
Penso che questo smalto è un po 'più effettato rispetto al precedente 


Here I made a stamping test with them....
Qui ho provato a timbrare con essi ....


...and here I stamped over black.
...e qui ho timbrato su nero.


What do you think about them? Let me know *___*

Che ne pensate? Fatemi sapere *___*


Friday 15 August 2014

Negative LeadLight With AliExpress Spring Set Plate


Hi guys! Here is my today's manicure using the LeadLight Technique (in this case is a "reverse" LeadLight). I stamped with Spring Set 10 plate and Essence special stamping polish white over a black base (Sinful Colors "Black on Black"). After that I simply coloured over the white image stamped using Yes Love K021, Lady Venezia 091 and Kiko 391 previously mixed with clear polish  (for this technique you can see my video tutorial more under)...and voilà!


Ciao ragazze! Ecco la mia manicure di oggi fatta con la tecnica Leadlight (in questo caso è un LeadLight invertito). Ho timbrato con  la piastra Spring Set 10  e lo smalto speciale per stamping bianco di Essence su una base nera (Sinful Colors "Black on Black"). Dopo di che ho semplicemente colorato sull'immagine bianca timbrata usando Yes Love K021, Lady Venezia 091 e Kiko 391  precedentemente mescolati con smalto trasparente (per questa tecnica potete vedere il mio  video tutorial più sotto) ... e voilà!


The same manicure before add  colors.
La stessa manicure prima di aggiungere i colori.


Sping Set 10


Spring Set video tutorial


Leadlight Technique video tutorial


What I used:

Cosa ho Usato:

  1. Base: SinfulColors Black oOn Black
  2. Stamping Plate:  Spring Set 10 
  3. Stamping Special Polish: Essence white 
  4. Polishes for LeadLightl: Yes Love K021, Lady Venezia 091, Kiko 391 and Essence 101 Absolute Pure (transparent)
  5. Top coat: Essence Quick Dry and then Essence Gel Look 


Have a nice day!!!!!

Saturday 9 August 2014

Spring Set Stamping Plates Review and Swatches


Hey stamperellas!!! The set of stamping plates that I would show you today has arrived to me two weeks ago but only now I found the time to make  this post with video tutorial....It's an AliExpress set called "Spring" that contains 25 plates. Some images of them are dupes of Konad and of other plates but the price is good and also the quality.


Hey stamperellas !!! Il set di piastre  che vorrei mostrarvi oggi mi è arrivato due settimane fa, ma solo ora ho trovato il tempo di fare questo post con video tutorial .... Si tratta di un set di AliExpress chiamato "Spring" che contiene 25 piastre. Alcune immagini  di esse sono dupes di Konad e di altri piatti, ma il prezzo è buono e anche la qualità.


The back side   /   Il lato  posteriore


The back have white sticker on it and the square images have different sizes that go from 12x15mm to 15x20mm. I paid 16.56$ for them but now they are sold at 18$ (free shipping) at this link.
There's also a version sold  with his own folder/album that you can find here.
If you are interested you can see how they stamp in the video tutorial more under.


 La parte posteriore ha un adesivo bianco e le immagini quadrate hanno dimensioni diverse che vanno da 12x15mm a 15x20mm. Li ho pagati 16,56 $, ma ora sono venduti a 18 $ (trasporto libero) a questo link.
C'è anche una versione venduta con la propria cartella/album che potete trovare qui.
Se siete interessati potete vedere come timbrano nel video tutorial più sotto.


Video tutorial


Have a nice weekend *____*